| Creating a New IMAP or POP Account |
|---|
Once you’ve installed The Bat!, the first thing you should do is create a new account. When you launch the program for the first time, it will prompt you on this. You can create new accounts at any time using the Account -> New menu in the main window of the program. 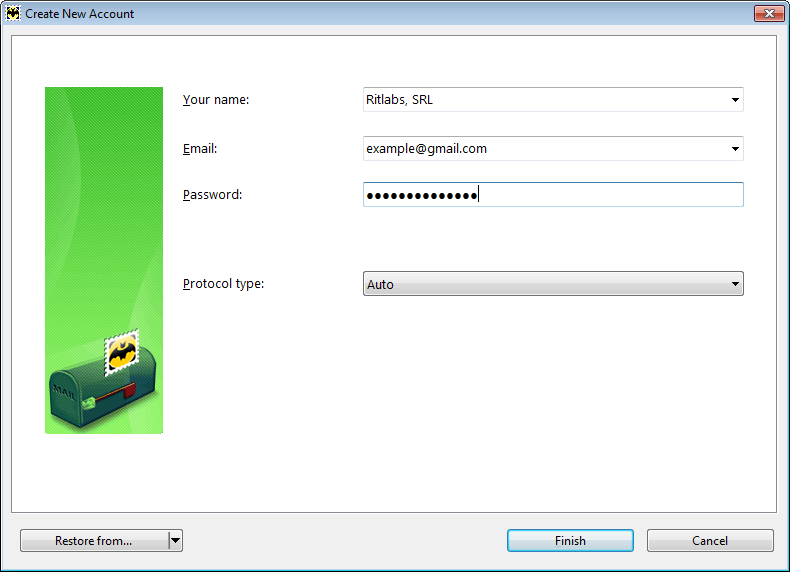 In the "Create New Account" window input your full name and email address. Your correspondents will see the name that you indicated in the "Your name" field next to your email address that is why you should pay attention to its format and language. In case you use the same name for all of your accounts, you can select it from the dropdown menu on the right side. Enter your email address, and the program will find all the necessary server settings. Input your password to access your mailbox – otherwise you will have to enter it each time when checking this account for new mail. If there is no need to specify additional settings, click "Finish". Your account will appear in the account tree. In the event that you need to access additional account settings or choose a certain protocol, select the "IMAP or POP" option from the dropdown menu of the "Protocol type" field and click "Next". 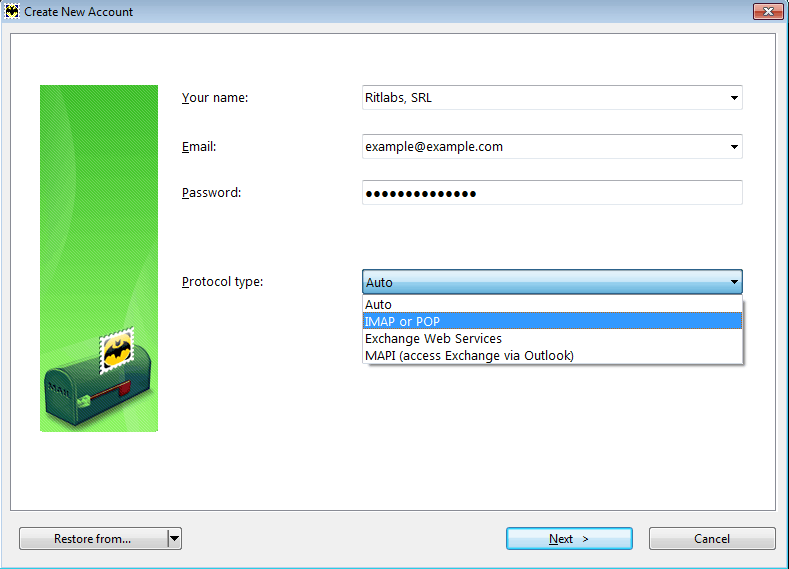 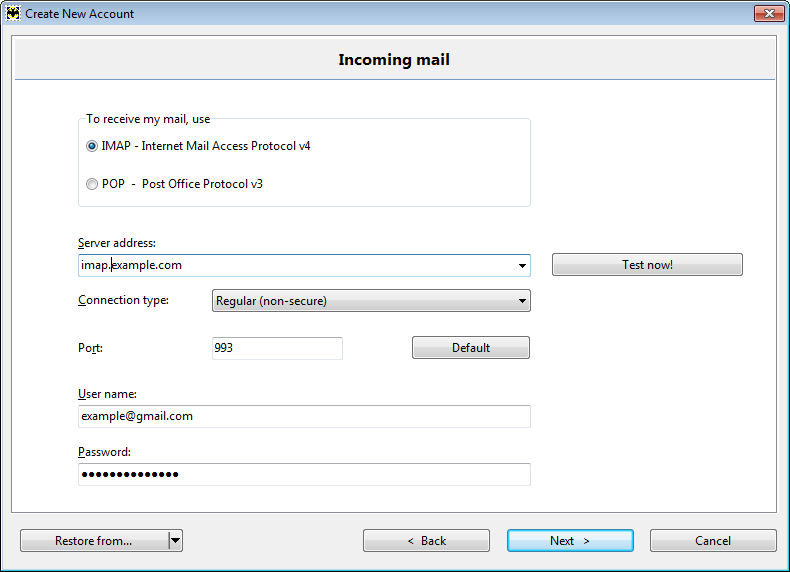 You can select the protocol for email retrieval – IMAP or POP – and specify the incoming mail server address. The Bat! automatically determines settings for the majority of mail servers, so you don't need to input them manually. You can find these settings on the website of your email service or ask your ISP or network administrator to provide them. As a rule, the "user name" is the same as email address or its part till the “@” sign. Once you specified all the settings, click "Next". 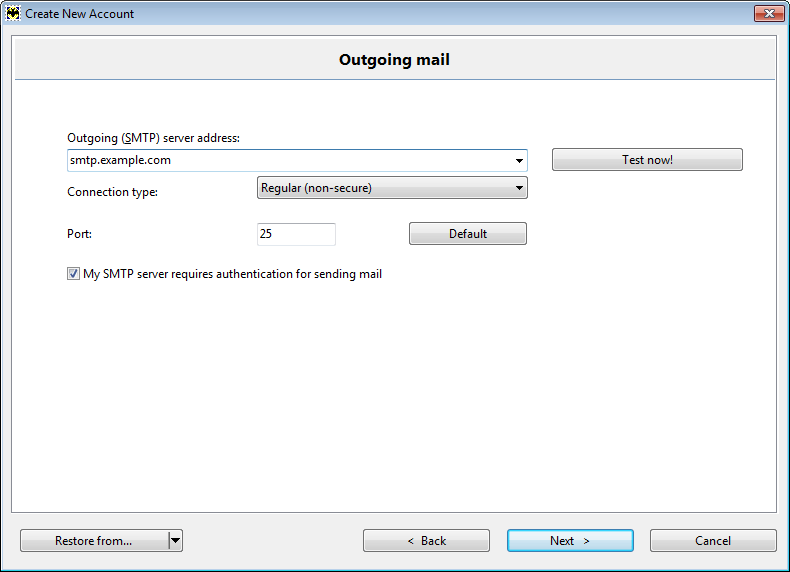 At this step you should specify the settings of your SMTP server. If the SMTP server requires authentication for sending mail, check the respective box. Click "Next" once you have defined all settings. 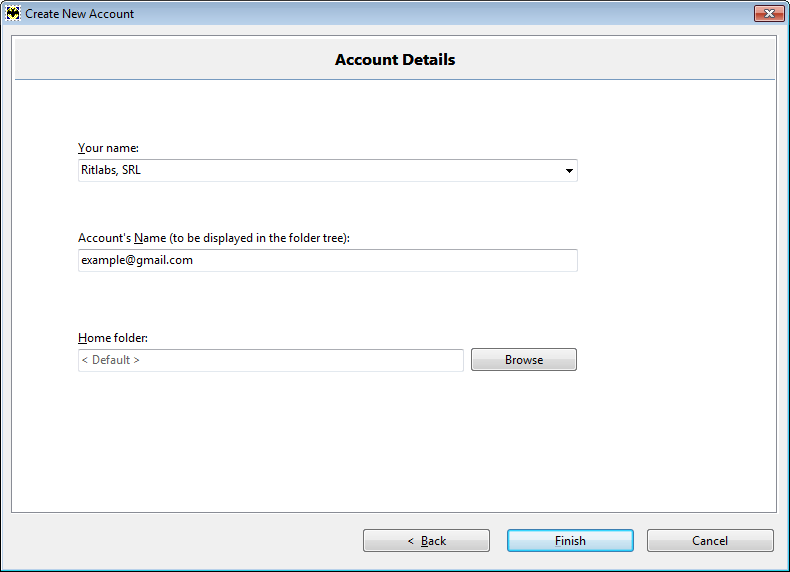 The "Your name" field will display your full name. The second field identifies your new account in The Bat!’s account tree. The last field shows the default location of the new account folder. If you want to choose another location, press the "Browse" button. Click "Finish" to finish creating the new account. |
The Bat! Help
|
Folders (6)
Sorting Office (4)
Macros (13)
XMP macros (9)
Checking Mail (2)
Reading Messages (7)
The Bat! Tools (8)
Address Book (7)
Backup (4)
Program Options (9)
|
Getting Started with The Bat!
| Trial Period and Registration |
|---|
|
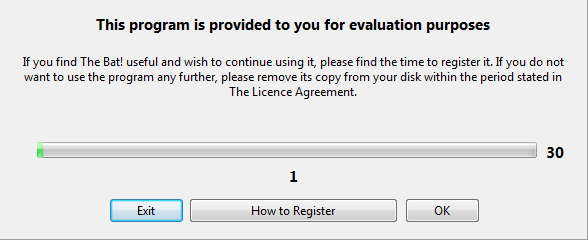
When you launch The Bat! for the first time, a dialog box will display telling you that you are using the program for evaluation purposes. You can use The Bat! during the 30-day trial period without registration. If you do not register it within 30 days, you will no longer be able to send and receive emails. You will receive this notification at each program start-up. To close it, click OK. If you decide to purchase a license, click "How to Register" and make use of the information provided on the webpage. If you click "Exit", The Bat! will close.
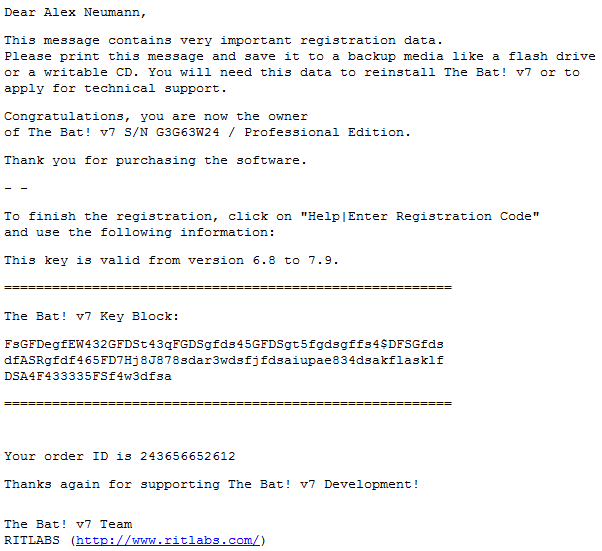
After you purchase the license, you will receive an email from The Bat! v7 Team. This email contains the Key Block and some other important information, so it is advisable to save it. You will need it, if you re-install the program, or contact our support team.
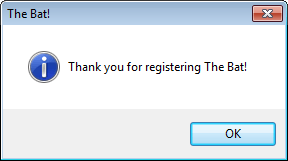
The registration will automatically be completed when you open the email with the key block. You will then see the notification of a successful registration.
If you lose your registration key, please contact the Ritlabs Support Team. |
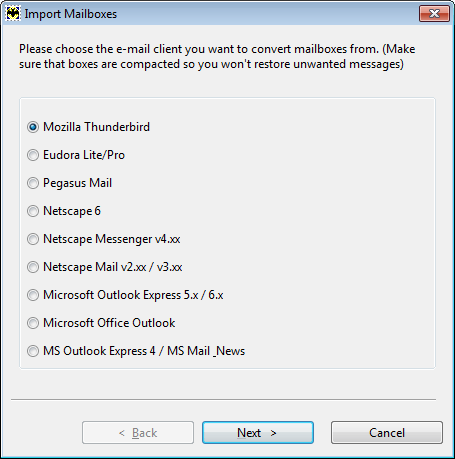
| Data Import |
|---|
|
If you previously used another email program and now want to import messages and contacts from it into The Bat!, you can get it done in a few clicks.
|


| Sending and Receiving Emails |
|---|
|
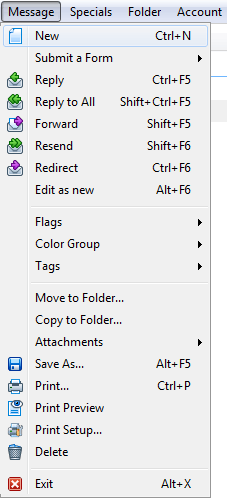
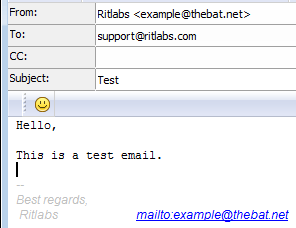
Once you have created and configured an account, you can start sending and receiving emails. To compose an email, click the icon "Create a new message" The "Edit Mail Message" window appears on the screen. Input the recipient’s address into the "To " field, add the Subject and enter the text of the email.
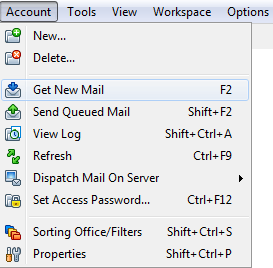
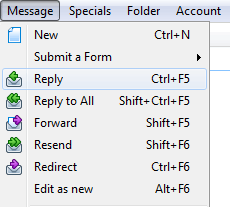
After you’ve composed the email, you can "Send the message" Click the "Receive new mail" icon on the standard toolbar or use the Account -> Get New Mail menu (F2) to get new emails.
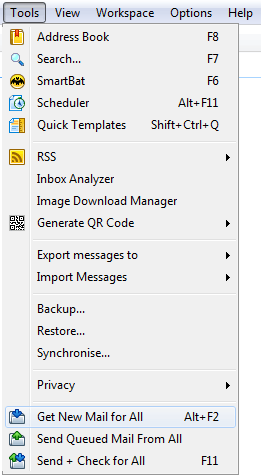
If you need to check all the accounts at once, use the Tools -> Get New Mail for All menu (Alt+F2).
The program displays new messages in bold in the message list. To see message text in the Message Auto-view section, select the email in the list. Double-click the email to open it in a separate window.
|


| Help topics and tip of the day |
|---|
|
If you have any questions regarding The Bat! features, you can read The Bat! help topics by choosing the Help Topics option in the Help section. After you click Help Topics the web-browser window will open and display the main section of The Bat! Help on our website. You can open the help topics by pressing the F1 key in any program window. The web-browser window will open the respective article that describes the options of this window. For example, if you press the F1 key or the Help button in the Sorting Office window, the Sorting Office section in our The Bat! Help will be opened. To learn some helpful tips about The Bat!, access the Help -> Tip of The Day menu. In the Tip of The Day window use the Next tip and Previous tip buttons to open new tips. You can also enable the Display The Tip Of The Day at startup option in this window. Note that if you enable this option the tip of the day will appear only once per day when you start The Bat! for the first time. |