| Making a Backup Copy |
|---|
|
The backup function in The Bat! helps to secure your emails, address books and settings from data loss. To make a backup copy, use the Tools -> Backup menu. You can then specify the data you want to back up. 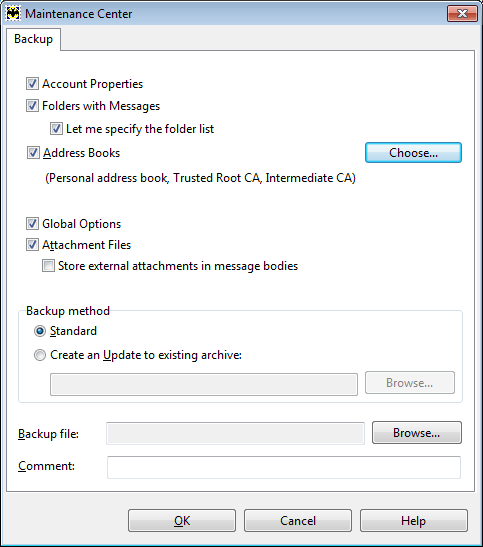
Select "Account Properties", if you want to back up account settings under Account -> Properties. To include emails in the backup file, select "Folders with Messages". If you check the "Let me specify the folder list" box, you will be able to exclude certain folders from the backup. You can also back up "Address Books". Click the "Choose" button to select the needed address books. If you select "Global Options", The Bat! will back up all program settings under Options -> Preferences. If you store attached files in a separate directory, check the "Attachments Files" option. Hint: If you perform the backup to switch to The Bat! Professional and use encryption, remember to check the "Store external attachments in message bodies" option. Choose between two backup methods: if you select "Standard", the program creates a backup file that includes all the specified data; if you choose "Create an Update to existing archive" and add an existing backup file, The Bat! will back up only the data that misses in the previous backup file. This file will have a smaller size. Specify the name of the backup file and define the directory to save it. Add comments to the file if needed. Click OK and select the accounts to back up. You can "protect the archive with a password" to ensure your data stays private. To restore data from this file you will need to enter the password. 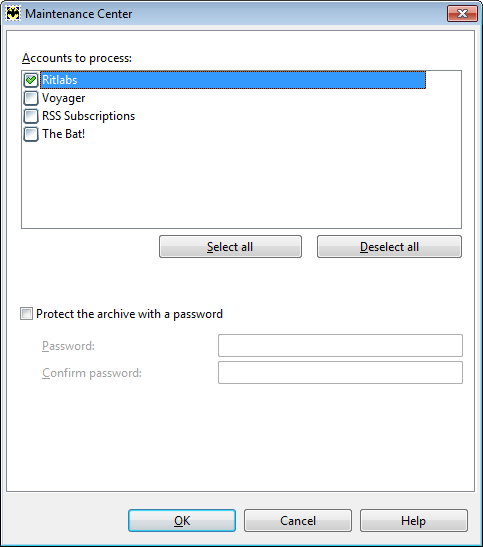
If you selected the "Let me specify the folder list" option you will be able to choose the folders to back up. 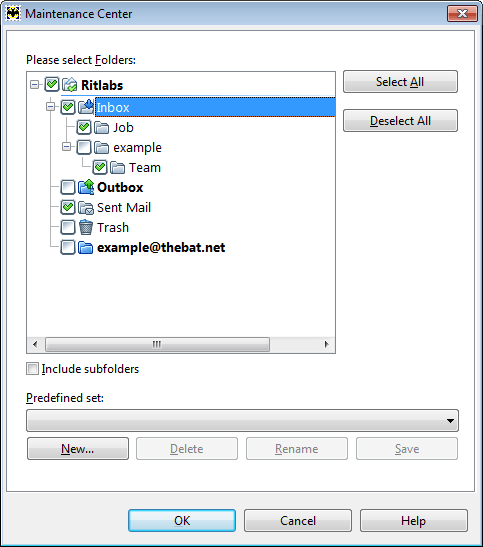
Select the folders you want to add to the archive. If you check the "Include subfolders" box, the subfolders of the selected folder will also be included in the backup file. You can define a set of folders that will be included in the backup file. For example, you can include Inbox and Sent folders in a set: select these folders and click New. Next time when you back up these folders you can just select this predefined set from the dropdown menu. Click OK to start the backup process. |
The Bat! Help
|
Folders (6)
Sorting Office (4)
Macros (13)
XMP macros (9)
Checking Mail (2)
Reading Messages (7)
The Bat! Tools (8)
Address Book (7)
Backup (4)
Program Options (9)
|
Backup
| Configuring Automatic Backup |
|---|
|
You can configure The Bat! to automatically perform a backup at a specified time. Method 1 To enable automatic backup, access the Options -> Preferences -> System menu and check the "Backup every … days" box. You can change the number of days and set the exact time to start the backup process. 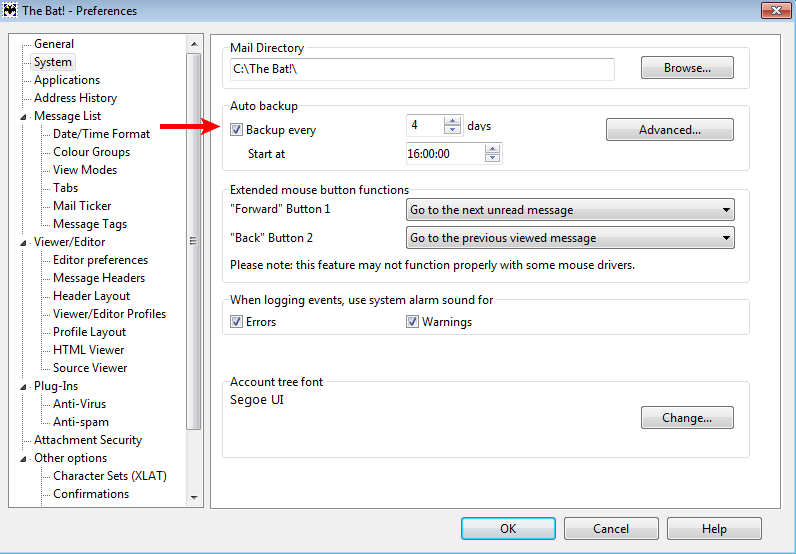
Click "Advanced" to open the backup settings. 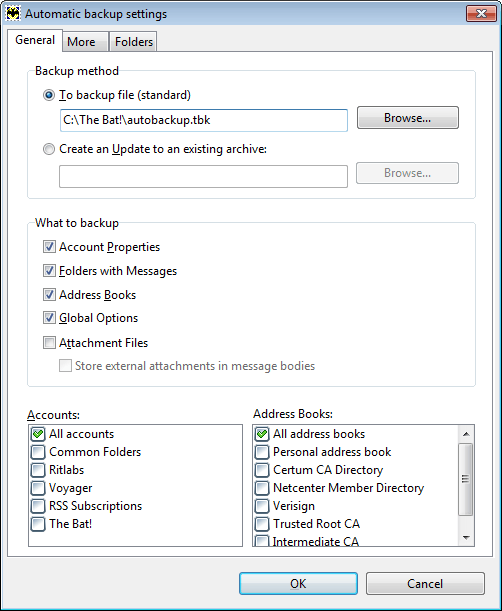
In the General section, select the backup method. If you choose "To backup file (standard)", the program will create a backup file that includes all the selected data. The Bat! will automatically create the autobackup.tbk file. Click the "Browse" button if you want to change the directory of the archive. To use the second method, select "Create an Update to an existing archive" and add an existing backup file. The Bat! will back up only the data that is missing in the selected backup file. Select the data to back up: account properties, folders with messages, address books, global options, and/or attached files. You can specify the accounts and address books to include in the archive. 
If you want to add a comment or "protect the archive with a password", switch to the More tab. Remember that you will be able to restore data from a password-protected archive only after you enter the password. 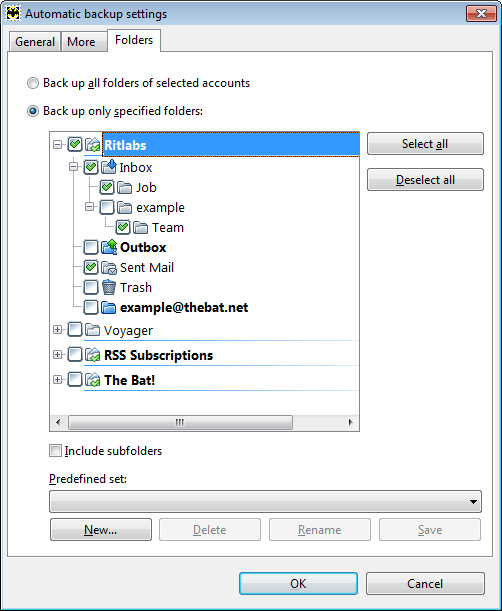
In the Folders section you can define the folders to back up. To quickly select a set of folders you can use a predefined set. Click OK to save changes. Method 2 The second method to set up automatic backup is to create an event in the Scheduler. Access the Tools -> Scheduler menu (Alt+F11), right-click the task section and select "New "(Insert). 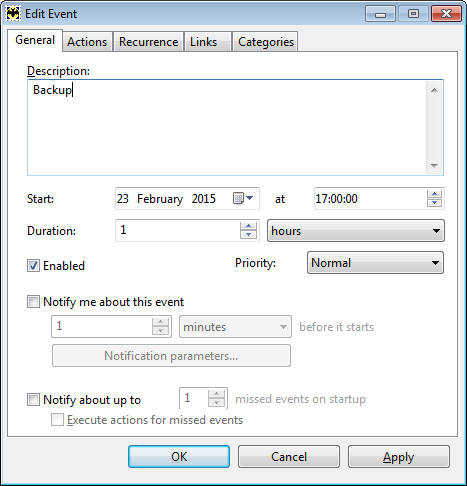
Enter the name of the event in the Description field. This name will be displayed in the task section of the Scheduler window. Define the date and the time to start the task. There is no need to set the duration, as the task will be automatically completed once the program finishes the backup process. Make sure the event is enabled. To get a notification before the event starts, check the "Notify me about this event" box. During the backup process all the program functions are not available, so you can enable the notification if you do not want to be unexpectedly interrupted when processing emails. If The Bat! is not running at the time the event starts, the program will not perform backup. However, if you enable the "Notify about up to … missed events" on startup and "Execute actions for missed events" options, The Bat! will automatically back up data at the next program startup. Switch to the Actions tab, click the "Add" button and select the "Backup" action. 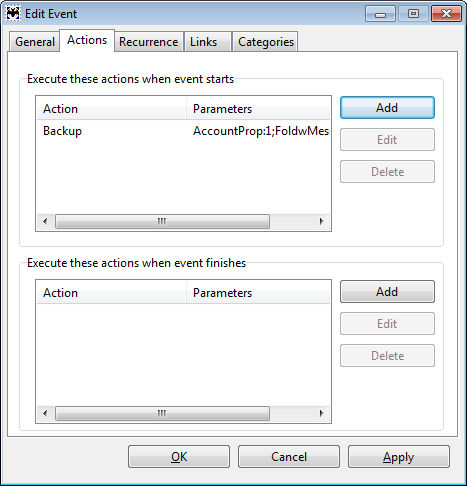
In the Recurrence section, you can specify the repeating of the event. Check the "Repeat this event every" box and set the respective value for seconds/minutes/hours/days/weeks/months/years. 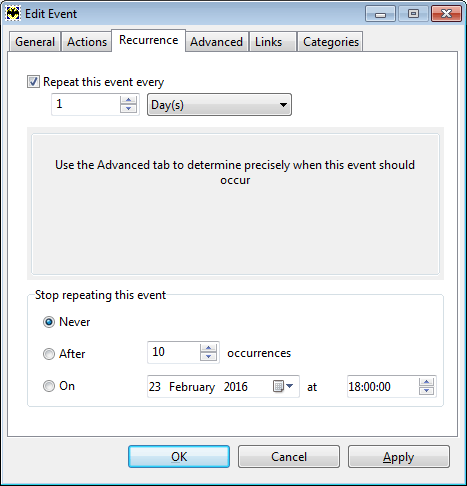
To set a more precise repeating frequency, switch to the Advanced tab. 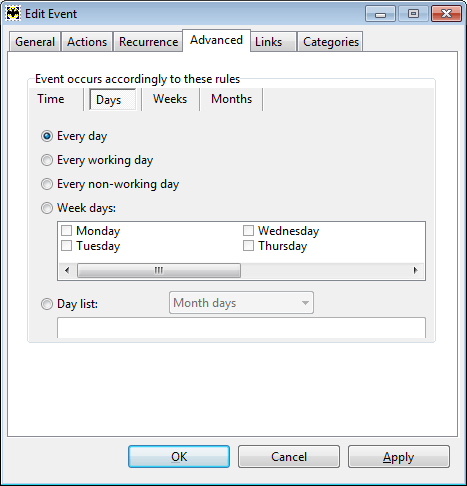
Click ОК to save the event settings. To change the settings of the automatic backup event, open the Scheduler, right-click the respective task and select "Properties" (Enter). |
| Disabling Automatic Backup |
|---|
|
To disable automatic backup, access the Options -> Preferences -> System menu and disable the "Backup every … days" option. 
Make sure there are no tasks in the Scheduler that perform backup: access the Tools -> Scheduler menu (Alt+F11), right-click the backup task and select "Delete". 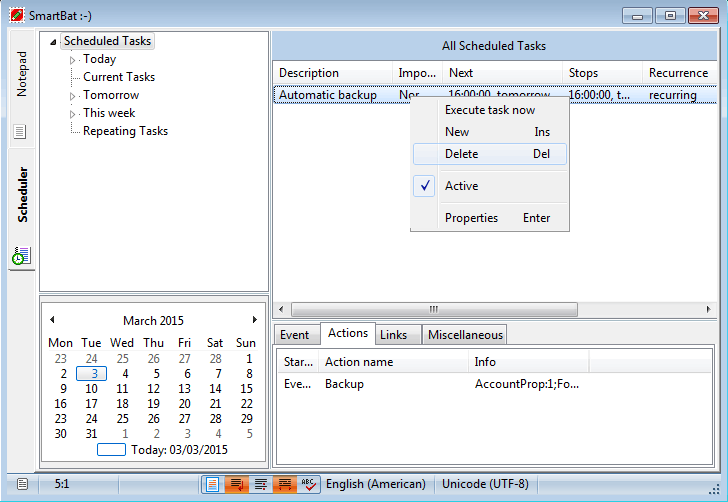
|
| Restoring from a Backup |
|---|
|
When you re-install the program you can restore all the accounts, address books and settings from the backup file. To restore data, access the Tools -> Restore menu, click the Add button and point to the backup file which you previously created. Backup files in The Bat! have the .tbk extension. If you created separate backup files for several accounts or updates to existing archive, you can restore the data from all these backup files at once. 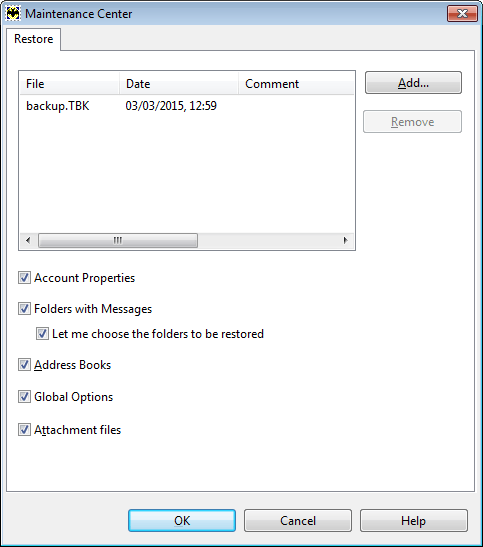
Select the data you want to restore: Account properties, folders with messages, address books, global options or attachment files. If you check the "Let me choose the folders to be restored" box, you will be able to select certain folders to be restored. 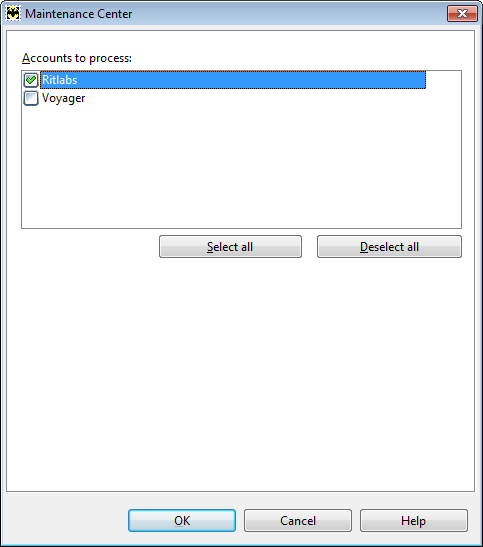
After you click OK, a new window appears where you should select the accounts you want to restore. If the "Let me choose the folders to be restored" option was enabled, you will be able to select the folders after you click OK. 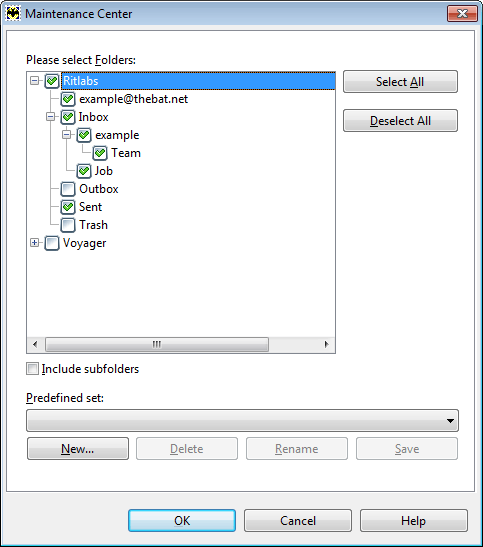
To quickly select the needed folder you can use a predefined set of folders. Click OK to start the restore process. This process might take a while, so you should wait till the program successfully finishes it. |