| Creating New Contact |
|---|
|
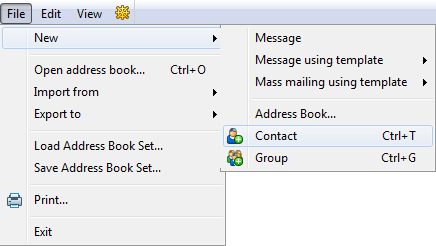
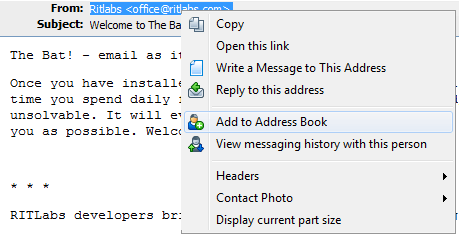
Adding contacts to the address book makes it easy to manage your correspondents. If you compose an email to a person that is added to your address book, The Bat! will suggest his or her address once you enter the first letters. To add a new contact to your address book, do any of the following:
|
The Bat! Help
|
Folders (6)
Sorting Office (4)
Macros (13)
XMP macros (9)
Checking Mail (2)
Reading Messages (7)
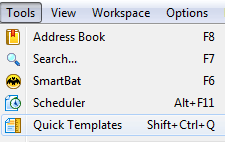
The Bat! Tools (8)
Address Book (7)
Backup (4)
Program Options (9)
|
Address Book

 on the toolbar:
| Address Book Entries |
|---|
|
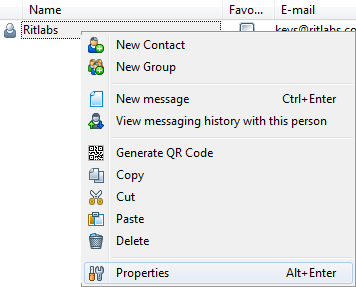
The Bat! allows you to save all sorts of information about a contact, including his or her email address, name, organization, date of birth, and more. To access contact properties either double-click the contact or right-click it and select "Properties" (Alt+Enter).
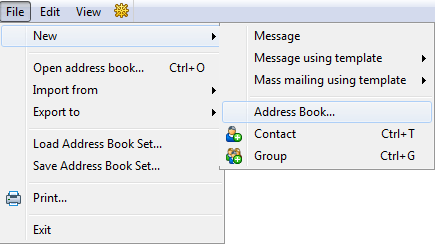
The "Edit Address Entry" window appears. At the bottom-left corner you can select the address book to which your contact will be added. For example, you can save your personal and business contacts in different address books. To create an address book use the File -> New -> Address Book menu.
The "Edit Address Entry" window contains several tabs:
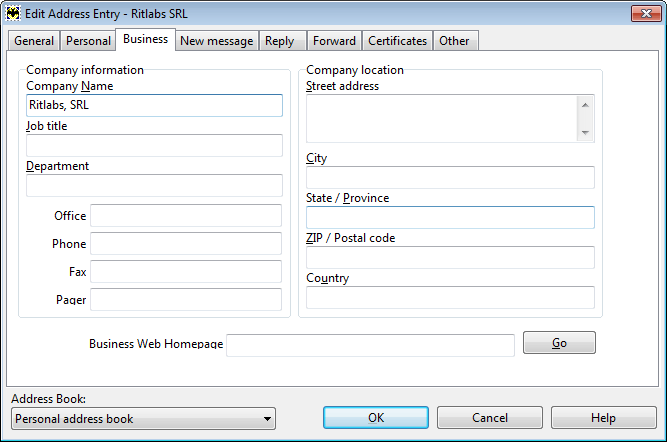
Under the General tab you can specify person’s first, middle, last name, nickname (handle) and gender. You can define the display name of the contact (for example, first last name or last, first middle name, etc.) If you want to add this contact to a group, click the button to the right of the Groups field and select the groups. Finally, you can add a photo that will be displayed on the headers pane. Each contact may have secondary email addresses as well. The first address will be used for all new messages by default.
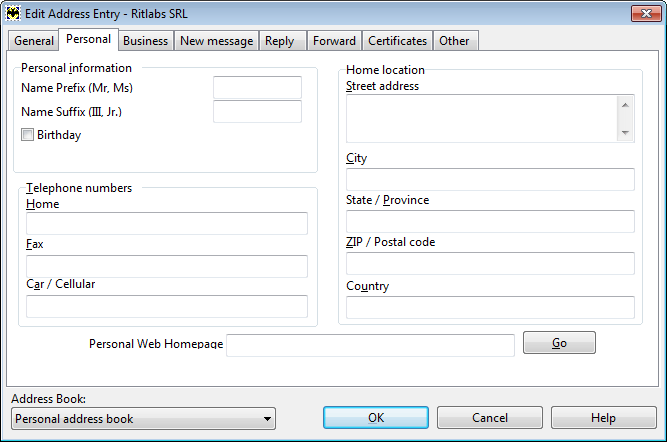
Under the Personal tab you can add some more information about the person, such as name prefix or suffix, date of birth, telephone numbers, home address and web-page. The Bat! checks address books for those who have birthday this day on each program startup or at midnight if the program is running and can remind you of them.
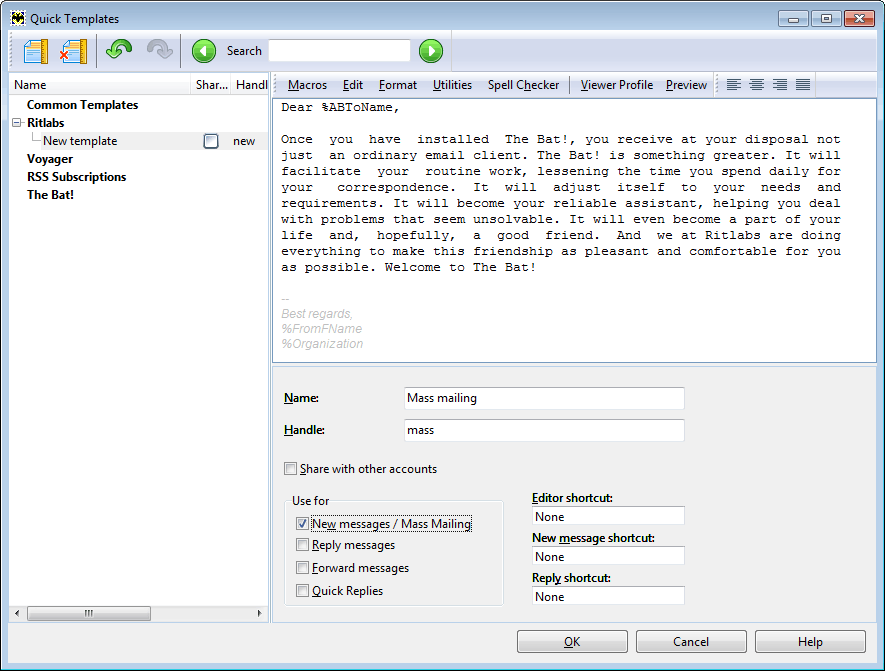
As you already learned from the Templates section, templates can be set for accounts, folders, address book groups and contacts. You can specify templates for a contact under the New message, Reply and Forward tabs. To add certificates, switch to the Certificates tab.
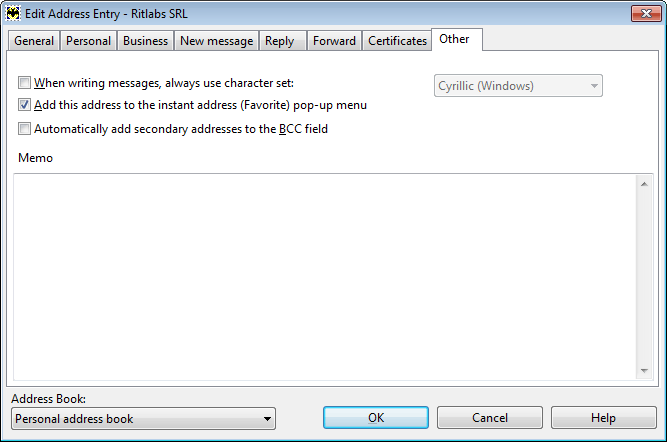
- When writing messages, always use character set: You can specify a certain character set for messages to this contact. This can be useful for foreign correspondents.
- Add this address to the instant address (Favorite) pop-up menu: If you select this check box, the address will be displayed in the pop-up menu of the "Create a new message" icon. To add a contact to favorites, you can also check the box in the Favorite column in the contact list of the address book.
- Automatically add secondary addresses to the BCC field: This option can be useful if you added secondary addresses for this contact. If you enable this check box, The Bat! will add these addresses to the BCC field. This function will work only if you create a message using the File -> New -> Message menu in the Address Book. |


| Address Book Groups |
|---|
|
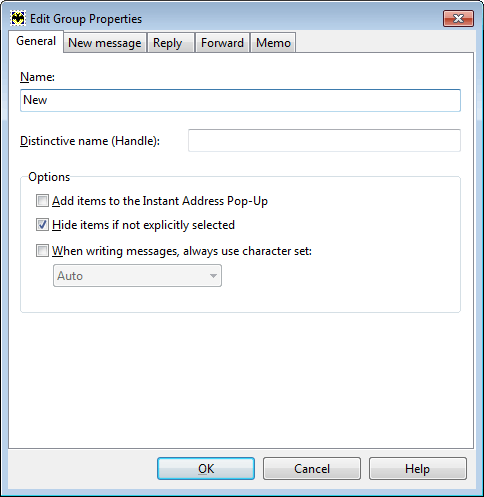
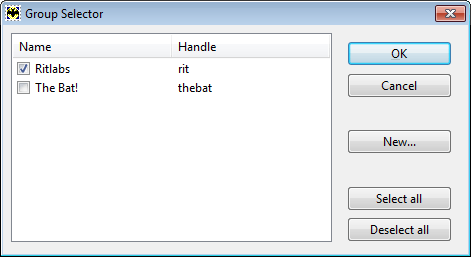
You can group your address book contacts to manage them more effectively. Each group can have its own templates for new message, reply and forward. You can add a contact to as many groups as you wish. If you want to send an email to a group instead of entering their addresses, enter the handle of the address book group in the To field. To address each recipient personally, use mass mailing. To create a new address book group select the address book and click the icon To add a contact to a group, invoke its Properties, click the icon |
 or use the File -> New -> Group menu (Ctrl+G).
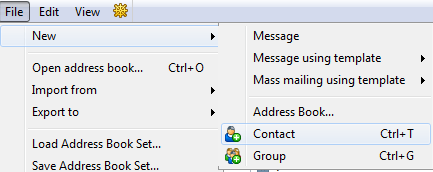
 to the right of the Groups field and select groups from the list in the "Group Selector" window.
| Mass Mailing |
|---|
|
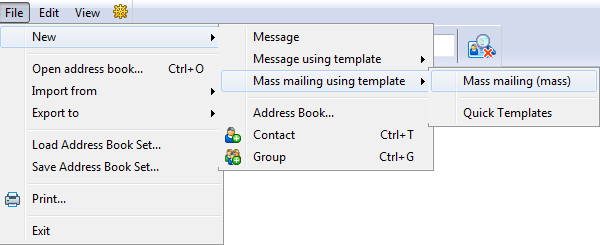
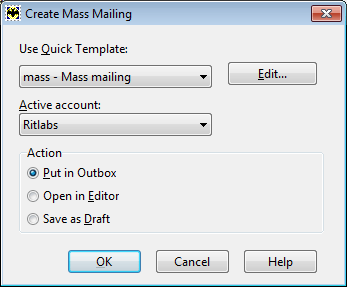
If you want to send the same email to several recipients and address each personally, make use of mass mailing.
Make sure all recipients belong to one address book group. If you created a quick template, you will see two new menu items in the address book – "Message using template" and "Mass mailing using template". Sel ect the recipients in the list holding down the Ctrl key and select one of these options.
|
| Import and Export Contacts |
|---|
|
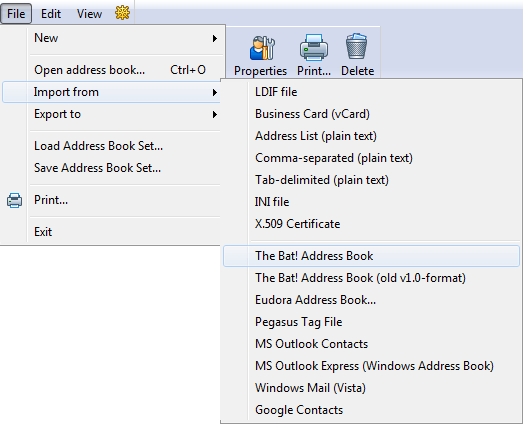
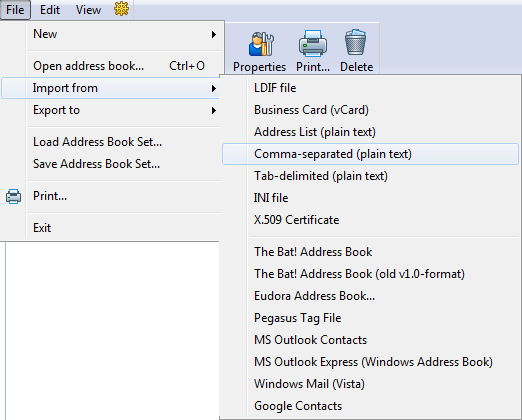
The Bat! offers the possibility to import address book contacts. You can import address books from the following programs: Eudora, Pegasus, Microsoft Outlook, MS Outlook Express, Windows Mail, and older versions of The Bat! Click the icon If the email client that you previously used is missing from this list, you can then export your contacts in one of the following formats supported by The Bat!: .LDIF, vCard (business card), .CSV (comma-separated plain text), .TDF (tab-delimited plain text), .INI, .TXT (address list). Besides this, you can import contacts into The Bat! from X.509 Certificate. Use the File -> Import from menu to import contacts from these files.
To export contacts from The Bat! use the File -> Export to menu and select the needed format. If you need to export several contacts only, select them and choose the "Export selection" option. |
 on the standard toolbar, or choose Address book from the Tools menu (F8), and select the program from the File -> Import from menu. The Bat! will automatically perform the import of the address book contacts.
| Address Book Synchronization (CardDAV) |
|---|
|
General Information How to Sync Google Contacts How to Sync iCloud Contacts How to Sync Address Book with Fruux How to Sync Address Book with Posteo.de How to Sync Address Book with FastMail General Information The Bat! supports the CardDAV protocol, which allows syncing The Bat!’s address book contacts with CardDAV servers, including Google and iCloud contacts. You can add, edit or delete contacts in The Bat! – all these changes will be reflected on the server. Such synchronization is useful, when you access the same address book using different devices: for example, you can add a new contact using your smartphone or tablet, and it will appear in The Bat!’s address book after you sync it with your CardDAV server. To sync an address book with the server, access its properties and select the "Associated with a CardDAV server" option on the General tab. Specify the synchronization parameters: for example, if you select "when mail arrive" the program will automatically sync the contacts once you use the "Get New Mail" command in the respective account. You can also sync address books when The Bat! starts, periodically or manually. To manually sync your address book, right click it and select the "Synchronize" option. 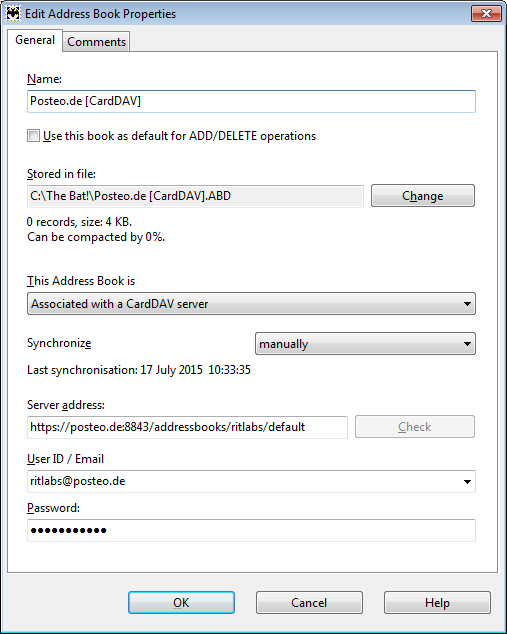 To configure the address book synchronization you have to specify the following data:
If you want to sync your address book in The Bat! with Google contacts, select the "Associated with Google Contacts" option in the properties of your address book and input your Google email address. 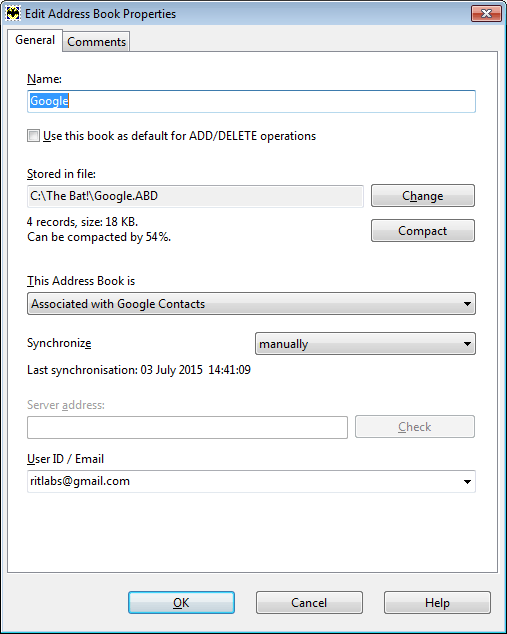 During the first address book synchronization a new browser window will open – You will need to enter your Gmail account password, log in and allow The Bat! to access the account. 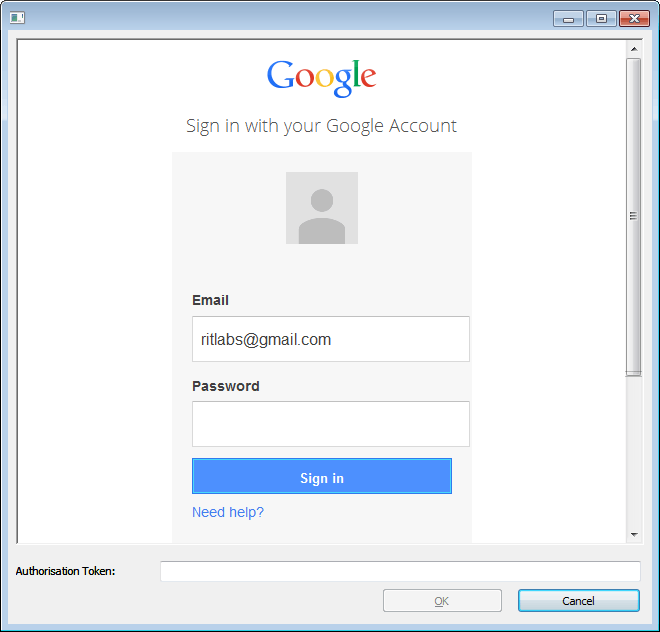 Next time The Bat! will sync your Google contacts automatically. How to Sync iCloud Contacts You can sync your address book in The Bat! with your iCloud contacts. Select the "Associated with iCloud Contacts" option in the properties of the address book and input your Apple ID and password: 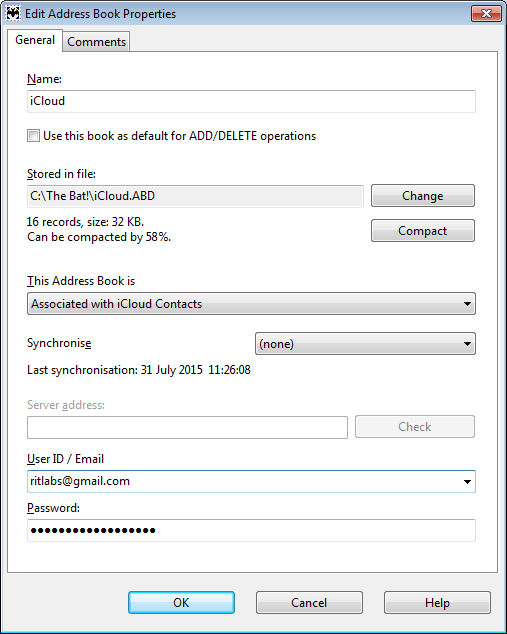 All changes on your iCloud server will be synced with The Bat! address book. To manually sync your address book, right click it and select the "Synchronize" option. How to Sync Address Book with Fruux If you have a fruux account, then you can sync fruux contacts with your address book in The Bat! Create a new address book and input the following Server address in its properties: https://dav.fruux.com/ Enter the email address that you used when you registered at fruux or a specified username in the User ID / Email field. Input your password and save changes. To manually sync your address book, right click it and select the "Synchronize" option. 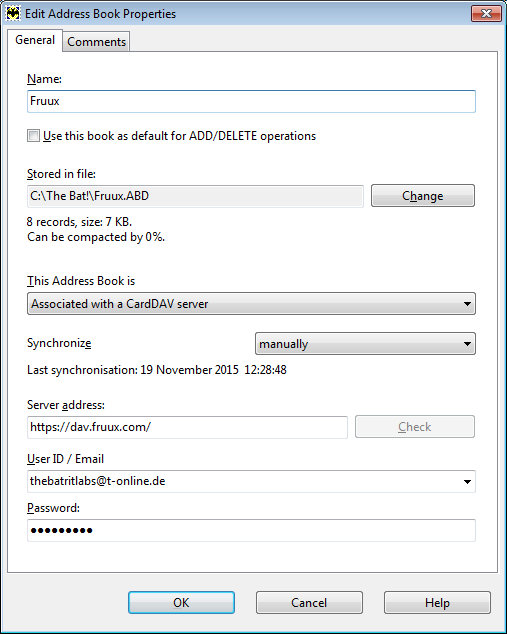 How to Sync Address Book with Posteo.de To sync your address book in The Bat! with Posteo.de, select the "Associated with a CardDAV server" option in its properties and use the following URL in the Server address field replacing "john.example" with your Posteo username (the part of your email address till “@”): https://posteo.de:8843/addressbooks/john.example/default Use your Posteo email address in the User ID / Email field, input your Posteo password and save changes. 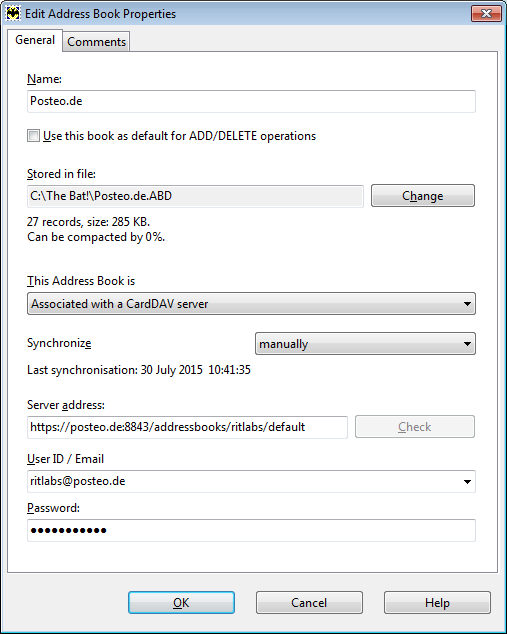 To manually sync your address book, right click it and select the "Synchronize" option. How to Sync Address Book with FastMail To set up FastMail contacts synchronization, use the following Server address: https://carddav.messagingengine.com/dav/addressbooks/user/username@domain.tld/Default/ Use your email address instead of username@domain.tld. User your FastMail email address in the User ID / Email field and input your password. 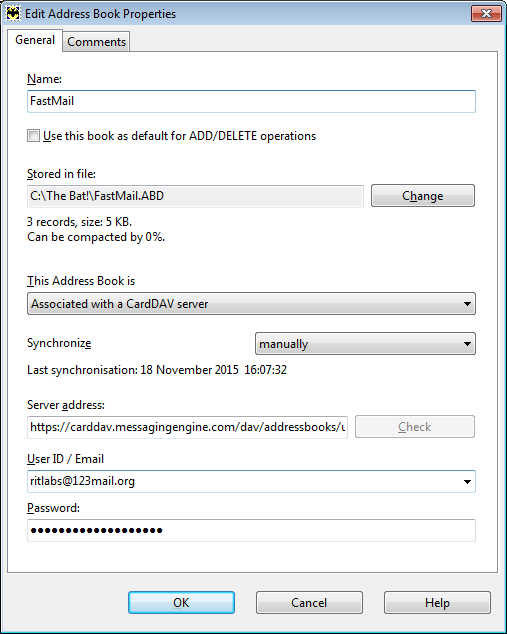 To sync the address book, right click it and select "Synchronize". |
| Address History |
|---|
|
Address history makes it easy to follow correspondence. The Bat! can automatically collect information about the correspondents you specify. To access the address history, switch to the Addresses folder tab under the account tree.
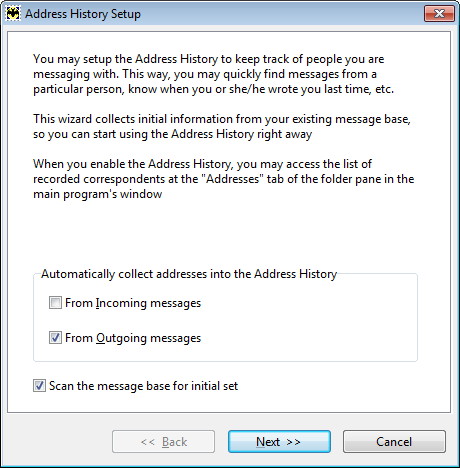
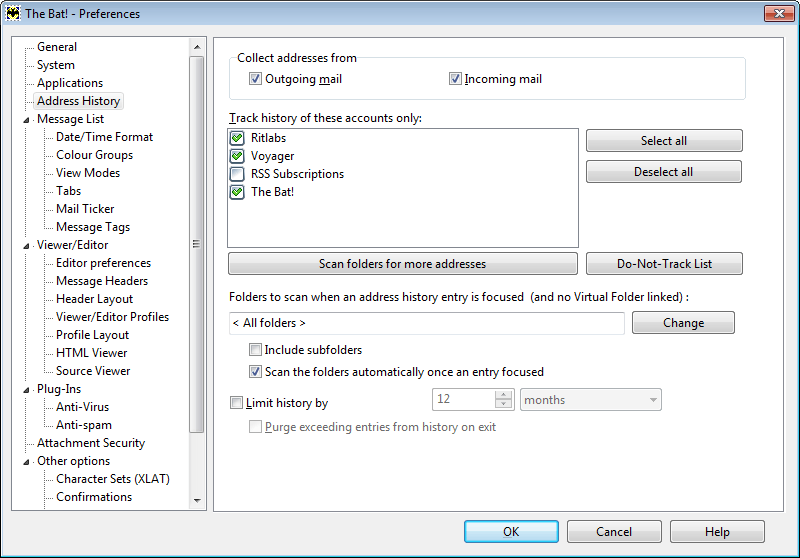
When you switch to this tab for the first time The Bat! automatically opens the "Address History Setup" window. You can define from what category of messages – Incoming or outgoing – The Bat! will collect addresses. The program offers to scan the message base for initial set. Check the needed boxes, and click Next.
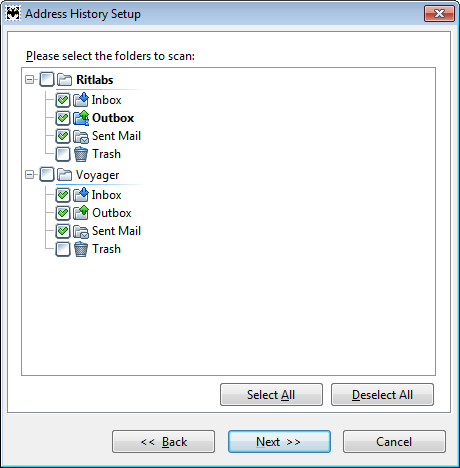
Select the folders that should be scanned:
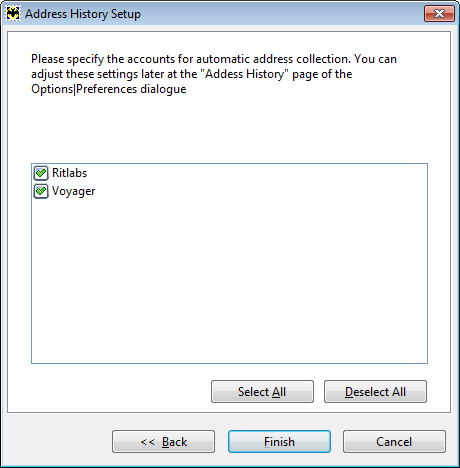
After the scanning is finished, The Bat! will offer you either to track all correspondents or only those you have recently contacted. The time range can vary from one day to several months. If you change the time range you will notice that the number of contacts to track changes too.
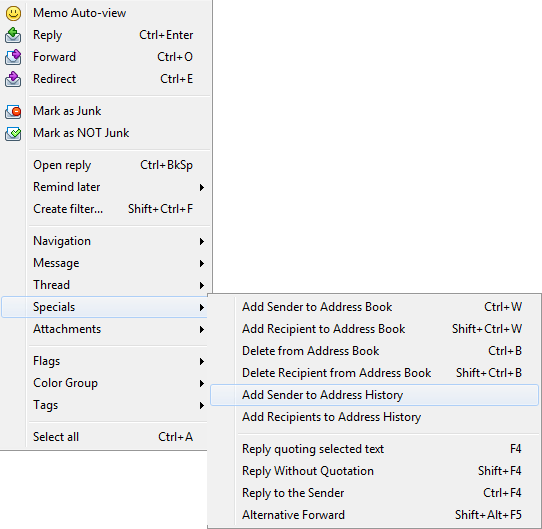
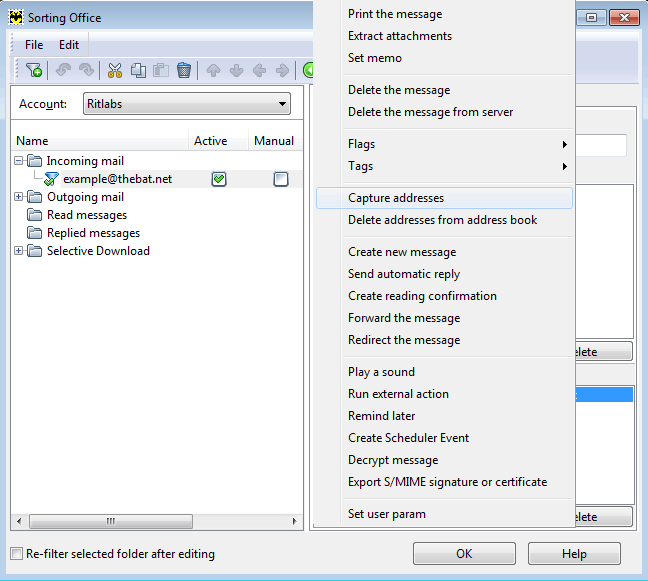
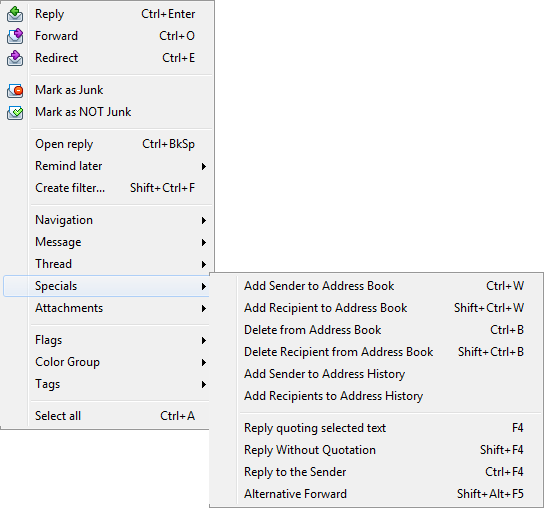
You will now see the list of correspondents under the Addresses tab. Once you select a contact you will see the messages sent from or to him (depending on your settings) in the message list. The new incoming or outgoing messages will also be added to the address history. Later you can add new contacts to the address history using the Specials -> Add Sender to Address History menu. This menu item is available in the context menu as well.
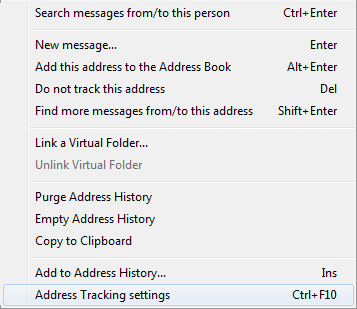
To configure address history use the Options -> Preferences -> Address History menu. You can access it directly from the Addresses tab, right-clicking the address history list area and selecting "Address Tracking settings" (Ctrl+F10).
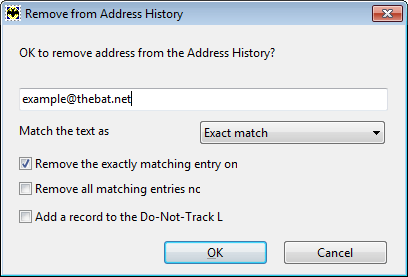
You can change the settings you chose when you first configured address history. To add addresses that should not be tracked, click the "Do-Not-Track List" button. You can add exact addresses or addresses matching certain criteria here. It is possible to limit history by several months and purge exceeding entries from history on exit.
|