| Privacy and Security |
|---|
|
The Bat! offers a number of security and privacy features. To limit access to an account, you can protect it with a password using the Account -> Set Access Password menu (Ctrl+F12). Thus you can control access to this account via program interface. You will be able to open the contents of such account after you enter the specified access password. In The Bat! Professional you can also encrypt the message base stored on the computer. Enable the "on-the-fly encryption" of message base and set a master password when you first launch the program. When you use message base encryption, all the data (messages, address books, configuration files) are be stored encrypted. The program uses AES encryption algorithm in CBC mode with 128-bit key. To access the program in this case, you have to enter the specified master password. There is no way to change the master password from within the program. To change it or disable encryption you would need to create a backup of your data using the Tools -> Backup menu, close The Bat!, remove the "RIT" key in the registry editor under "HKEY_CURRENT_USER\Software\...\", launch The Bat! and restore data from the *.tbk backup file. Hardware security tokens are available in The Bat! Professional version only. Note: If you lose your security token, you will not be able to access your encrypted message base. The Bat! helps to protect the privacy of your business and personal correspondence by employing OpenPGP and S/MIME to sign or encrypt emails. The Bat! supports PGP up to version 10.0.2 and S/MIME via the Internal Implementation or Microsoft CryptoAPI. Further security measures include:
|
The Bat! Help
|
Folders (6)
Sorting Office (4)
Macros (13)
Checking Mail (2)
Reading Messages (7)
The Bat! Tools (8)
Address Book (7)
Backup (4)
Program Options (9)
|
Privacy and Security
| Attachment Security |
|---|
The Bat! does not open attachments automatically. The program warns you whenever you try to open an attachment and asks you if you rather want to save it. To open attachments without a warning hold down the Shift key when you double-click the attached file.  Using the Options -> Preferences -> Attachment Security menu you can specify the file types to be opened without warning: input the needed file formats into the "Allow opening of these files without any alert" field (use the form [wildcard].[extension], i.e. *.JPG). |
| Anti-Virus Plugins |
|---|
|
Besides preventing the user from accidentally opening malicious attachments, The Bat! offers a plugin interface to make use of third-party anti-virus plugins. After you install the anti-virus plugin to your computer, launch The Bat! and access the Options -> Preferences -> Plug-Ins -> Anti-Virus menu. Click the "Add" button and select the respective *.bav file. Enable the "Check incoming mail for viruses" option. 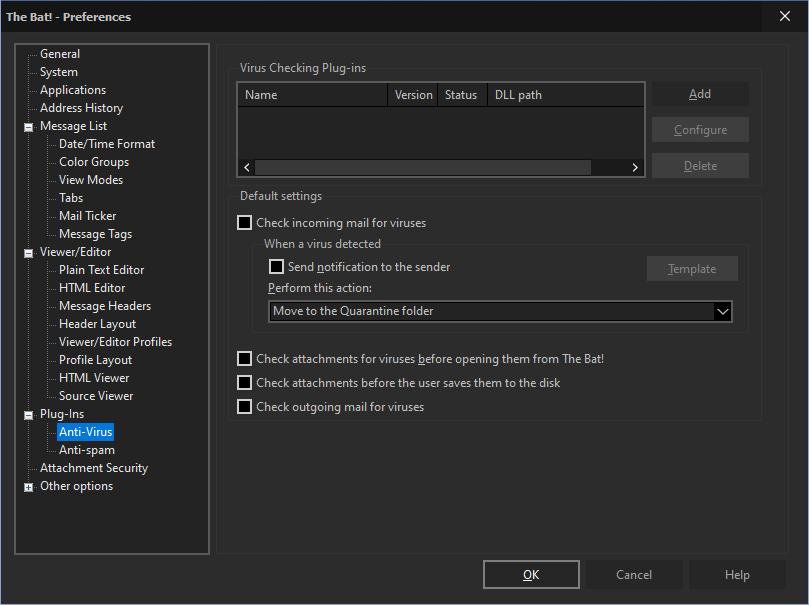 Enable the "Send notification to the sender" option to send a reply to the sender using a template. Note that most modern viruses fake the sender’s address making it unlikely that any message will actually reach the individual whose computer is sending out the infected messages. Choose one of the following actions that will be performed when an infected message is detected:
Any anti-virus plugin may have additional settings. Click the "Configure" button to access these settings. To remove a plugin, click the "Delete" button. |
| Anti-spam Plugins |
|---|
|
The Bat! offers integration with anti-spam plugins developed by third-parties. You can find some of the anti-spam plugins in the Plugins section. Download and install the anti-spam plug-in. After this access the Options -> Preferences -> Plug-Ins -> Anti-spam menu, click the "Add" button and select the *.TBP file. Click the "Configure" button to access additional plugin settings. 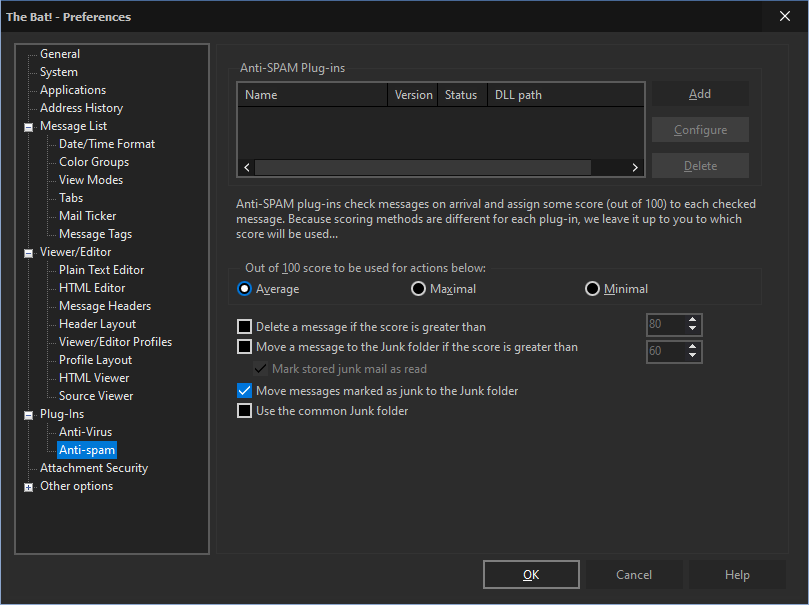 The "Out of 100 score to be used for actions below" option is important, if you installed more than one anti-spam plugin. Plugins may use different scoring systems. Choose if you want the maximal/minimal score or the average to be used. Example: Plugin A gives a score of 50, plugin B gives a score of 70; check “Maximal” to use the score of 70, “Minimal” to use 50 or “Average” to use 60. You can define the minimum amount of points needed to delete a message enabling the "Delete a message if the score is greater than" option as well as the minimum amount of points to move a message to the Junk folder. The Junk folder is automatically created when you receive the first junk message, or manually mark a message as junk. If you enable the "Move messages marked as junk to the Junk folder" option, messages that you manually mark as junk will also be moved to the Junk folder. Each account can have its own Junk folder. If you enable the "Use the common Junk folder" option the program will create a common Junk folder for all accounts and move messages marked as junk into it. After you install the plugin you should “teach” it by marking approximately the same number of messages as Junk or as NOT Junk. To mark messages as Junk/NOT Junk, use the icons  on the toolbar or select the "Mark as Junk/ Mark as NOT Junk" option in the Specials menu. You can also right-click a message and select the "Mark as Junk/ Mark as NOT" option. on the toolbar or select the "Mark as Junk/ Mark as NOT Junk" option in the Specials menu. You can also right-click a message and select the "Mark as Junk/ Mark as NOT" option. |
| OpenPGP |
|---|
|
Choosing OpenPGP Version OpenPGP Key Manager Importing Public Keys Encrypting Messages Decrypting Messages Electronic Signature PGP/MIME Standard The Bat! helps you to protect the privacy of correspondences by employing OpenPGP to sign or encrypt your emails. You can also use PGP 10 or GnuPG in The Bat! Choosing OpenPGP Version First of all you should download, install and set up the preferred OpenPGP program. For example, you can install and use GnuPG: https://www.gpg4win.org/ While installing GnuPG, make sure Kleopatra (Key Manager) will be installed as well. Remember to input the correct path to the kleopatra.exe file in the GnuPG External Key Manager field in the Options → OpenPGP → OpenPGP Preferences menu. By default, it’s C:\Program Files (x86)\Gpg4win\bin\kleopatra.exe in 64-bit versions of Windows. 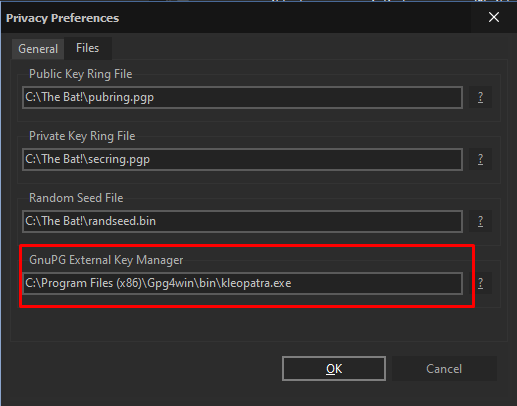 Then you can launch The Bat! and using the Options -> OpenPGP -> Choose OpenPGP Version menu select the preferred OpenPGP version (for example, GNU Privacy Guard (GPG). We strongly advise that you make yourself familiar with the OpenPGP concept before using it. Otherwise you may make mistakes which jeopardize your privacy, security and even access to messages. OpenPGP Key Manager To be able to encrypt and sign messages, you need to generate a key pair that consists of a public key and a private key. The public key should be given to your correspondents, while the private key should be kept absolutely secret. To generate a key pair, access the Options -> OpenPGP -> OpenPGP Key Manager menu. If you have installed GnuPG, then Kleopatra Key Manager will be opened in this case. Press the New Key Pair icon or choose New Key Pair item in the File menu to generate a key pair. 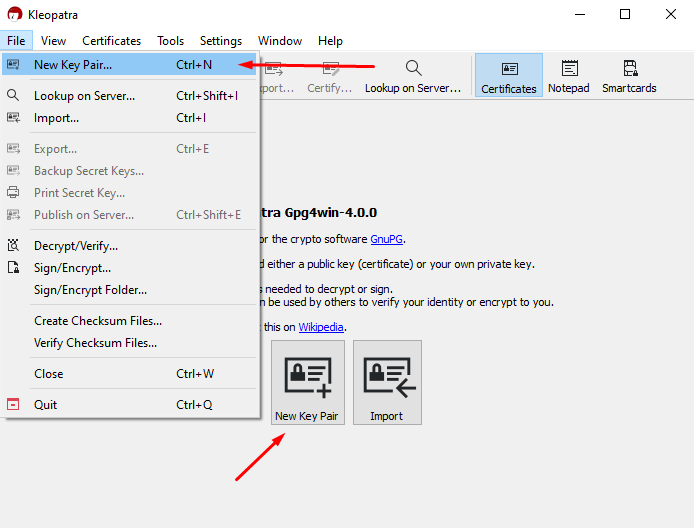 Follow the instructions of the Key Generation Wizard to generate the key pair. You will need to enter the name and the email address that will correspond to the key pair. Check the Protect the generated key with a passphrase box to protect your private key by a password. To decrypt the encrypted messages you will need to input this passphrase.  Press the Advanced Settings button to specify the size of the key pair. You can also define the exact key expiration date. Once your key pair is generated, you will see it in the keys list. 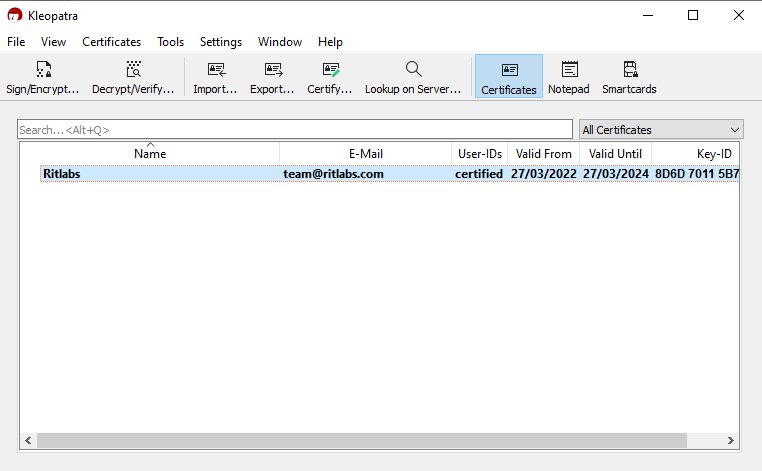 To export your public key, select your key pair and press the Export icon or access the File -> Export menu (Ctrl+E). Specify the name of the file, in which your public key will be stored. Do not export your private key. Send the file with the public key to your correspondents – they will encrypt messages to you using your public key. You can decrypt such encrypted messages using your private key. You can send your public key as an attachment or directly in the text of the email. To import public keys of your correspondents use the File -> Import menu (Ctrl+I). Use the public keys of your correspondents to encrypt messages to them. To see the properties of the key, select it and access the View -> Details menu (Enter). You can change the passphrase for your private key if needed. Importing Public Keys OpenPGP public keys can be distributed in plain ASCII text and it is therefore possible to embed public key in an email. Below is an example of a message with embedded public key. Hello John, This is my public key: -----BEGIN PGP PUBLIC KEY BLOCK----- Version: 2.6.3i mQBtAzPHTM0AAAEDAKCJ5/hM+qpxHaa4wFumqU2DEV4KfkKe5hkkfS6knTtn0rnD Zm/90txo+29gOFARBL8ynIpGA7fUgmNG13mprN9q/9xrtH4gg6jV/cYJ3ZtnKN9B sfw7QLKsW3r6eMYGsQAFEbQiU3RlZmFuIFRhbnVya292IDxzdGVmQHJpdGxhYnMu Y29tPokAdQMFEDPHTM2sW3r6eMYGsQEBft0DAIi04Yya7Q5ZZAtz2K4bKHitMBFV j1g0Vmr87Cr5qZYgGBzbNasyFwUuFqwqEuiwnLVNSpPiK8QsJTff6Ky9hqMUiZaL ENOzJ5f9GKw0pmMio7rOlKRE8Szbl6RkpeCUQw== =u13G -----END PGP PUBLIC KEY BLOCK----- All the best, Andrew To import OpenPGP public key from a message, access the Tools -> Privacy menu and select the "Import Key/Certificate" option. You can also click the icon  on the headers pane to import the public key. on the headers pane to import the public key. Encrypting Messages Using encryption you can ensure the privacy of your correspondence. Only those people to whose public keys the message is encrypted to, are able to read it. Beware: Some governments may restrict encryption. Beware: Although the algorithms used by OpenPGP are very safe and secure there is the possibility that a private key (needed for decryption) gets compromised. Manually Encrypting Messages Method 1 Select the "Enable OpenPGP" option in the Privacy menu in the Message Editor. Then enable the "Encrypt when Completed" option in the Privacy menu or click the icon  on the Security toolbar. You will be able to continue editing the message as it will be encrypted directly before you send it. on the Security toolbar. You will be able to continue editing the message as it will be encrypted directly before you send it. Method 2 Select the "Enable OpenPGP" option in the Privacy menu and choose one of the options – "Encrypt Entire Text" or "Sign & Encrypt Entire Text" in the Privacy -> OpenPGP menu. If you choose the second option, the message will be signed as well. Automatically Encrypting Messages You can set automatic encryption as well: Enable the "Encrypt when Completed" and "Enable OpenPGP" options in the Account -> Properties -> Options menu. Tip: You can use the %ENCRYPTCOMPLETE macro in the templates – in this case messages will be automatically encrypted before sending. Decrypting Messages To decrypt a message, select it and choose the "Decrypt" option in the Tools -> Privacy menu (Shift+Ctrl+D). The decrypted message is not stored in the message base to protect your privacy. Every time you want to read an encrypted message you have to decrypt it again. You can decrypt and save message if needed by selecting the respective option in the Tools -> Privacy menu (Shift+Ctrl+G). Note: The Bat! automatically checks the signature if there is one. Electronic Signature The electronic signature allows checking the authenticity of the sender. It ensures that any attempt to manipulate messages between you and the recipient is easily detected. Manually Signing Messages Method 1 Select the "Enable OpenPGP" option in the Privacy menu in the Message Editor. Then enable the "Sign when Completed" option in the Privacy menu or click the icon  on the Security toolbar. on the Security toolbar. Method 2 Select the "Enable OpenPGP" option in the Privacy menu and choose one of the options – "Sign Block" or "Sign Entire Text" in the Privacy -> OpenPGP menu. Automatically Signing Messages You can set up automatic signing as well: Enable the "Sign when Completed" and "Enable OpenPGP" options in the Account -> Properties -> Options menu. Tip: Use the %SIGNCOMPLETE macro in the templates to enable automatic message signing. Verifying Signatures A yellow checkmark appears on the message flag if the message is signed  . To verify the signature, select the message and use the Tools -> Privacy -> Verify Signature menu (Shift+Ctrl+C) or click the icon . To verify the signature, select the message and use the Tools -> Privacy -> Verify Signature menu (Shift+Ctrl+C) or click the icon  on the right-hand side of the headers pane. on the right-hand side of the headers pane. PGP/MIME Standard PGP stands for Pretty Good Privacy; MIME stands for Multipurpose Internet Mail Extensions; The PGP/MIME standard provides secure messaging conforming to:
Note: Some email clients may handle PGP/MIME-signed messages improperly. For those recipients you can use the %NOPGPMIME macro in the templates. |
| S/MIME |
|---|
|
Certificate Management Internal S/MIME Implementation Microsoft CryptoAPI Electronic Signature Encrypting Messages Decrypting Messages S/MIME Standard Certificate Management Obtaining a Certificate You can get an S/MIME certificate from a certification authority (CA) or create a self-signed certificate. Using internal S/MIME implementation you can create a certificate: access the Account -> Properties -> General menu and click the "Edit personal Certificates" button. In the new window click the "Generate" button and edit certificate items and values. At the final stage input the passphrase to protect the certificate.  Your correspondent who received your signed message will have to add your self-signed certificate to the certificate store only once. You can also send your certificate to a CA to certify it. It is not necessary to create a certificate in The Bat! You can get it directly from any Certification Authority. Once you get the certificate, import it to the program. You can now delete your self-signed certificate and use the CA-issued one to sign and decrypt messages. View Certificates To view certificates of your address book contacts, open the Address Book (F8), select a contact and access the Edit -> Properties menu. You can view the certificate under the Certificates tab. To view your own certificate, access the Account -> Properties -> General -> Edit personal Certificates menu. Select the certificate and click "View". In the Details section you will see the serial number of your certificate and its version, signature algorithm (calculation method used in producing a signature from this certificate), validity period, issuer and subject (name and email address associated with this certificate). In the Certification Path section you can see all signatures associated with the certificate up to the CA. Export Certificate Internal implementation of S/MIME allows you to export selected certificates to a file for backup or distribution (e.g. import into other programs or The Bat! installations). To export a certificate, access the Tools -> Address Book menu (F8), select the contact and go to its Properties (Edit -> Properties). Under the Certificates tab select the needed certificate and click "Export". Certificates are exported to known, open formats only. 
Note: This option works with standards supporting multiple certificates in a single file.
Import Certificate There are several methods of importing certificates into The Bat!: Method 1 Open the message containing a certificate and view the certificate by clicking the icon  which you will see on the right-hand side of the headers pane. Select the certificate and click "View". In the General section click the "Add to Address Book" button to import the certificate. Next time you receive an email signed with this certificate you will see the icon which you will see on the right-hand side of the headers pane. Select the certificate and click "View". In the General section click the "Add to Address Book" button to import the certificate. Next time you receive an email signed with this certificate you will see the icon  on the headers pane, which means that the signature is valid. on the headers pane, which means that the signature is valid. Method 2 Access the Address Book (F8), select the contact whose certificate you want to import and double-click it to open its properties. You can also use the Edit -> Properties menu to access the Properties of a contact. Switch to Certificates tab, click the "Import" button and select the certificate. Internal S/MIME Implementation You can switch to internal S/MIME implementation using the Options -> S/MIME and TLS menu. The main difference between the two engines is that internal implementation does not use any outside code. The disadvantage is the lack of flexibility: When it comes to using different third-party algorithms, storage media, or devices that perform certain operations at a hardware level, you will need to use the CryptoAPI engine, but it may work differently or with some limitations under different versions of Microsoft Windows.  If you choose the Internal Implementation, the following options will be available: Always encrypt to sender’s certificate This option allows encrypting sent messages to your own certificate – In this case you will be able to decrypt sent messages. Compress data before encryption Compression reduces message size and increases resistance to attacks. Beware: S/MIME compression may not be supported by other S/MIME-enabled email clients. Microsoft CryptoAPI does not support it. Cache certificate passphrases/keys for Choose the time interval a passphrase should be stored in memory before you have to re-enter it. You can select the preferred "Encryption algorithm" from the dropdown menu. Signing Hash Algorithm specifies which hash algorithm is used. The default SHA-1 is widely supported and is highly secure. If your recipient's S/MIME implementation does not support SHA-1, choose MD-5. "Random Seed File" path specifies the location where random data for key generation is stored. You can also enable the "Use time stamping server for digital signatures" option to add a timestamp to your signature – In this case the recipient will see the exact time the message was signed. Microsoft CryptoAPI This engine is part of Microsoft Windows. For further information consult Microsoft's documentation.  Always encrypt to sender’s certificate This option allows encrypting sent messages to your own certificate – In this case you will be able to decrypt sent messages. You can choose the preferred "Cryptographic Service Provider" from the dropdown menu. Note: If you choose a provider from the list, The Bat! will use only this provider; with selected, CryptoAPI will select the required providers corresponding to a particular algorithm, key type or certificate. Depending on the selected Cryptographic Service Provider you can choose the Encryption and Signing Hash Algorithms. Note: The Bat! adds one signature to a message when using Microsoft CryptoAPI. If the "Keep associations between email addresses and certificates for signing" option is active, The Bat! remembers the certificate used for signing messages. If you enable the "Keep associations between email addresses and certificates for encryption" option, the program will remember the certificate that was used for encryption. Electronic Signature An electronic S/MIME signature ensures that any attempt to manipulate messages between you and the recipient can be easily detected. The Bat! will even flag compromised messages in the message list automatically. Manually Signing Messages Select the "Enable S/MIME" option in the Privacy menu in the Message Editor. Then enable the "Sign when Completed" option in the Privacy menu or click the icon on the Security toolbar. Automatically Signing Messages You can set automatic signing as well: Enable the "Sign when Completed" and "Enable S/MIME" options in the Account -> Properties -> Options menu. Tip: Use the %SIGNCOMPLETE macro in the templates to enable automatic signing of messages. Verifying Signature A yellow checkmark appears on the message flag if a message is signed . To verify signature, select the message and use the Tools -> Privacy -> Verify Signature menu (Shift+Ctrl+C) or click the icon on the right-hand side of the headers pane. The Bat! verifies S/MIME signatures automatically and marks messages with either a tick or a cross  to indicate whether or not the message signature is valid. These icons appear on the headers pane. to indicate whether or not the message signature is valid. These icons appear on the headers pane. Encrypting Messages Using encryption, you can ensure the privacy of your correspondence. Only those people to whose public key the message is encrypted to, are able to read it. To encrypt messages, you have to import the recipient’s certificate into the program. Beware: Some governments may restrict encryption. Manually Encrypting Messages Select the "Enable S/MIME" option in the Privacy menu in the Message Editor. Then enable the "Encrypt when Completed" option in the Privacy menu or click the icon on the Security toolbar. You will be able to continue editing messages as they will be encrypted directly before you send them out. Automatically Encrypting Messages You can set automatic encryption as well: Enable the "Encrypt when Completed" and "Enable S/MIME" options in the Account -> Properties -> Options menu. Tip: You can use the %ENCRYPTCOMPLETE macro in the templates – in this case messages will automatically be encrypted before sending. Note: Remember to encrypt the message using your certificate as well, otherwise you will not be able to read encrypted sent messages. Decrypting Messages To decrypt a message, select it and choose the "Decrypt" option in the Tools -> Privacy menu (Shift+Ctrl+D). The decrypted message is not stored in the message base to protect your privacy. Every time you want to read an encrypted message, you have to decrypt it again. You can decrypt and save the message if needed, by selecting the respective option in the Tools -> Privacy menu (Shift+Ctrl+G). Note: The Bat! automatically checks signature, if there is one. S/MIME Standard S/MIME is a standard for signing and encrypting email. It conforms to the following RFCs:
|
| Hardware Security Tokens |
|---|
|
The hardware security token is a portable two-factor authentication token used for email security. Each token contains a unique 64-bit factory-installed serial number that differentiates an individual token from all other tokens. Installing Token Driver To use a token for message base encryption or POP3/SMTP authentication, you should first of all, install the driver and activate the token. Note: If you are using Aladdin eToken, access the following webpage to download the driver: http://www.aladdin-rd.ru/en/ You can download the driver for Rainbow iKey1000 from the following webpage: https://safenet.gemalto.com/technical-support/ Changing PIN After you install the driver, insert your token into a USB port and access its properties (eToken Properties). Select the "Change User PIN" option and enter the factory default PIN (factory PIN for eToken - 1234567890, User PIN for iKey – 12345678, Security Officer PIN for iKey - rainbow). Input the preferred password – it should consist of 5-10 symbols, namely digits, letters or punctuation marks. Token Manager and Token Activation Utility Before you can start using security token in The Bat! Professional you should:
Token Activation To activate a token, insert it into a USB port and launch the Token Activation utility using the Start -> All Programs -> The Bat! E-Mail -> Token Activation Utility menu. Select your token and click OK. 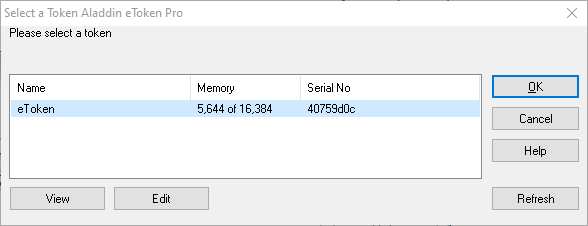 Input the order number of The Bat! Professional into the Order Number field and click "Submit". 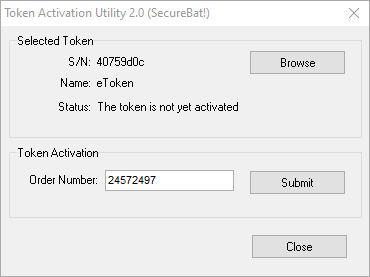 You should have received the order number for The Bat! Professional when purchasing the license. 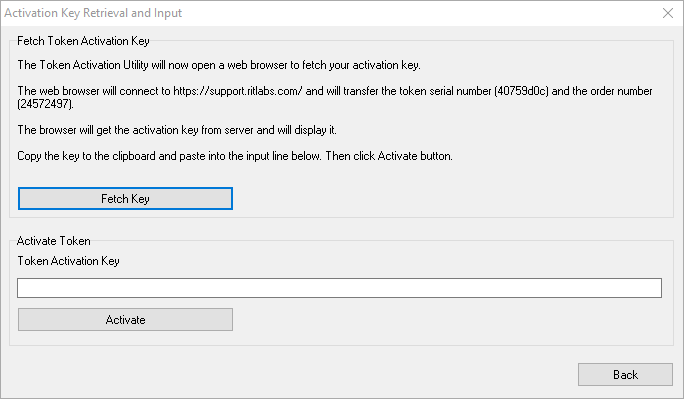 Click the "Fetch Key" button, to start a web-browser and open the webpage of our server with the activation key. Copy this activation key, paste it into the Token Activation Key field and click "Activate". At the next step you should input the specified password (PIN). 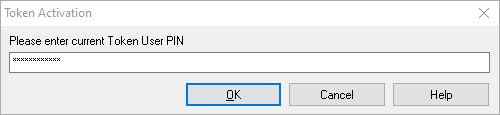 ID for Message Base Encryption To copy the ID for message base encryption, launch Token Manager using the Start -> All Programs -> The Bat! E-Mail -> Token Manager menu. When you first launch Token Manager you have to specify the master password. 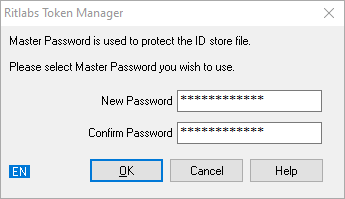 Click "Browse", select your token and click ОК. Input your password (PIN). When the token is selected, its name and serial number are displayed in the Selected Token field. Click the "New ID" button. 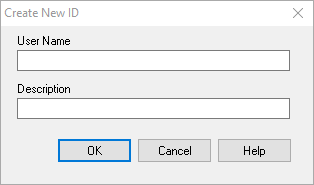 You should input the user name in the "User Name" field. The name may contain lowercase Latin letters, underscore, hyphen or points. Do not use capital letters, spaces or any other symbols in the name. The name should consist of 1-12 symbols. In the "Description" field enter the description of your token. 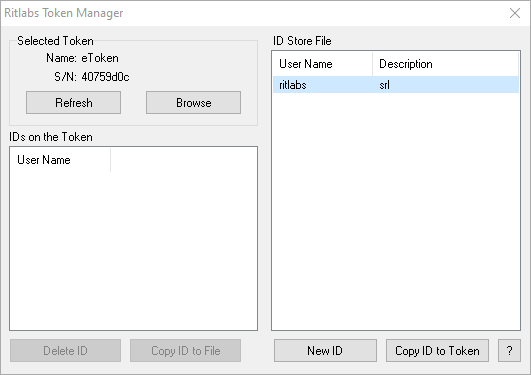 Copy the ID to the token selecting it and pressing the "Copy ID to Token" button. Installing The Bat! Professional Install The Bat! Professional and select the "Use on-the-fly encryption of message base and address books" option when you first launch it. Select the security token you are going to use to encrypt the data.  Now you should assign an ID from the token to the newly installed copy. Each ID consists of 3 elements: 128-bit encryption key, user name and description. IDs are stored on the hardware security tokens and can be retrieved when you start The Bat! Professional. To assign an ID to The Bat!, select the token and the ID that is stored on it. Please note that the token should contain at least one ID. The selected ID is assigned to The Bat! and is used to continue installation. Once installed, The Bat! Professional is permanently tied to the User Name of a specific ID, and it is not possible to reassign another ID to the existing The Bat! Professional. After you assign an ID, the installation process continues. This ID will be used for the on-the-fly encryption of The Bat! Professional operations. If the "Use on-the-fly encryption of message base and address books" option cannot be selected, then this means that you are either using The Bat! Home Edition, which does not support message base encryption, or the program has already been installed on your computer. If you are dealing with the second case, make a backup copy of all data and uninstall the program, then remove the "RIT" key in the registry editor under "HKEY_CURRENT_USER\Software\...\". Using security tokens for POP3/SMTP Authentication Access the Account -> Properties -> Transport menu and click the "Authentication" button in the “Send mail” or “Receive mail” section. If the token driver and API are installed on your computer, you will see a selectable checkbox for the security token: Token MD-5 CRAM-HMAC Challenge/Response in the “Mail Retrieval (POP3) Authentication” window or the "Store password on the token" option in the “Mail Transmission (SMTP) Authentication” window. Once the security token checkbox is ticked, two new group boxes will be displayed: The "Token to Use" group box displays the serial number and user name of the token selected to perform POP3 or SMTP authentication for that account. The serial number of the selected token is stored in the account configuration file. The Bat! will not perform authentication with that account using a token with a different serial number unless you click the "Browse" button and select another token. In order to display the name, the token with a given serial number should be plugged in and available (i.e. not used by another application). The "Token Password" group box offers three buttons to Set, Change or Remove a password that is stored on the token. |