| Message List |
|---|
|
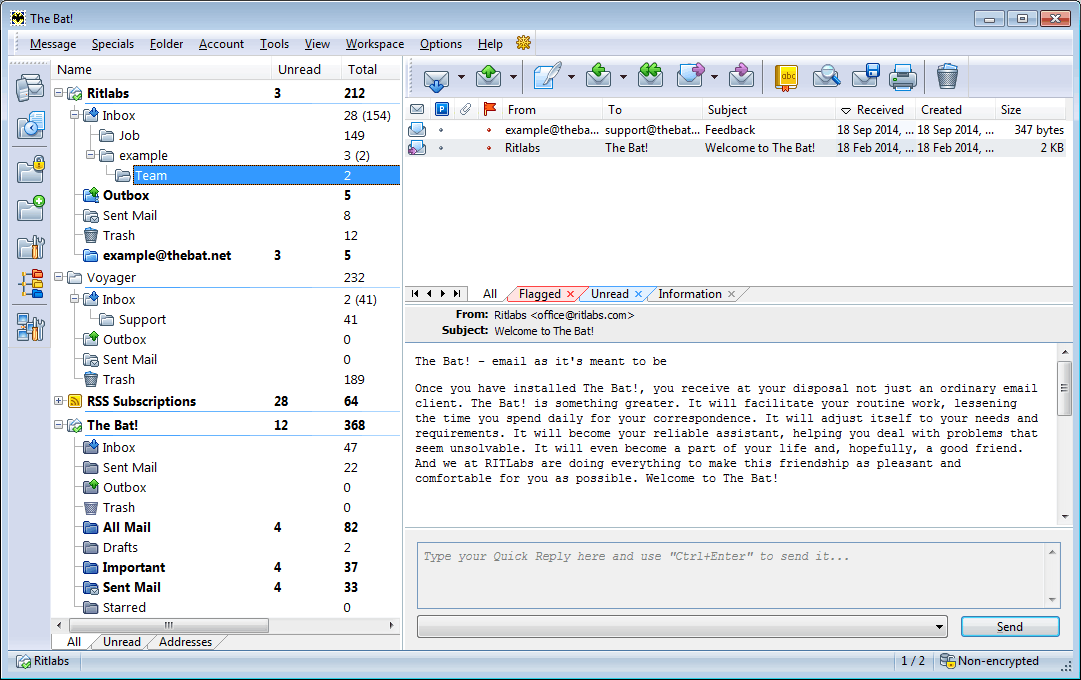
The main window of the program is divided into three sections – account tree, message list and message auto-view. When you select a folder in the account tree, its contents is shown in the message list. The text of the selected message is displayed in the message auto-view section.
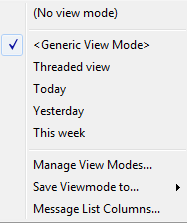
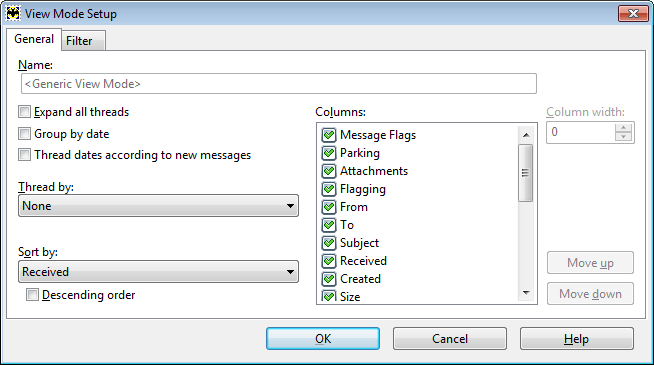
Selecting the "Message List Columns" option, you will open the "View Mode Setup" window:
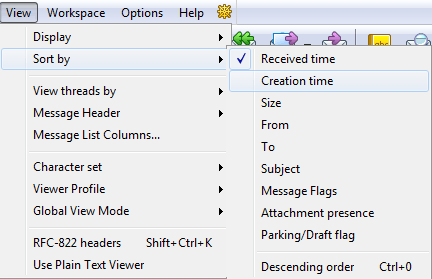
Using message list columns you can sort messages. When messages are sorted by a certain column, an arrow appears on this column indicating ascending or descending order. By default, the sorting order is ascending, meaning that the newest emails are displayed on the top of the list. To change the order (descending or ascending), click the column title or use the Ctrl+0 key combination. To change sorting criterion simply click the needed column or use the View -> Sort by menu.
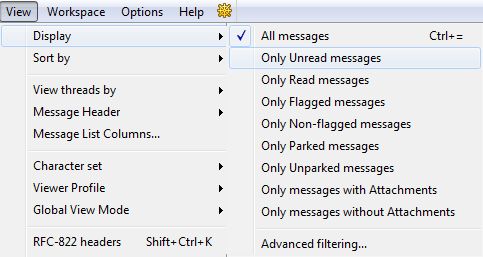
Messages can be filtered directly in the message list. For example, if you press the Alt key and click the sender’s name, The Bat! will display all messages from this sender in the current list. If you click the creation date, only messages created on that day will be displayed. You can apply this function to the other fields as well. To cancel filtering and display all messages, press either the Escape key or the Ctrl+= key combination.
The "quick search" allows you to find emails in the current message list. Start typing any word when your cursor is in the message list and the "Quick Search" toolbar will appear. 
The Quick search looks into the Subject, From and To fields. If the current folder does not contain messages that satisfy the condition, the quick search pane will become red. 
You can park and flag messages in the list. Flags help to highlight important emails while park signs save messages from being accidentally deleted or moved. If you move or delete parked messages manually, The Bat! will ask you to confirm that action. Make sure the columns Flagging and Parking are displayed in the message list. To set or remove a park sign or a flag, click the point in the respective column. You can right-click a message and select Flags -> Flagged/ Parked to set the flags. 
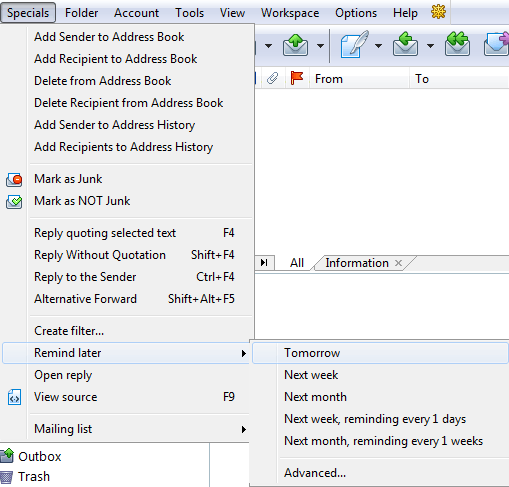
You can also set a reminder for a message in the list. This can be useful if you, for example, must answer an urgent email within one day. If no answer was sent within this time, The Bat! will remind you about it. To set a reminder, use the Specials -> Remind later menu. You can choose one of the reminder options or set your own reminder time selecting Advanced. The Open Links window will appear, there you can define some other options.
|
The Bat! Help
|
Folders (6)
Sorting Office (4)
Macros (13)
Checking Mail (2)
Reading Messages (7)
The Bat! Tools (8)
Address Book (7)
Backup (4)
Program Options (9)
|
Reading Messages
| Display Name in the Message List |
|---|
|
Starting from The Bat! v7.1 you can change the name of your correspondents displayed in the message list. By default, the program shows the name from the message header, i.e. the name that the sender used when he/she composed the email. If the sender did not use any name, his/her email address will be displayed in the From column. You can change the display name to the preferred one, if you add your correspondents to the address book. To specify the display name, select a contact, access its properties using the Edit -> Properties menu and input the preferred name into the Display name field. 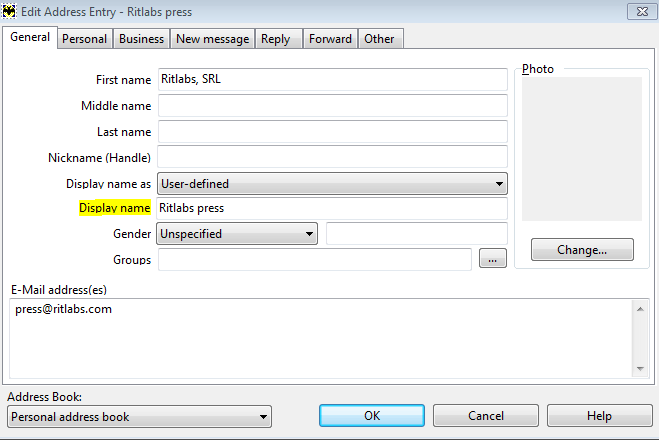 To use the display name of your address book contacts in the From and To message list columns, enable the "Use Address Book display names" option in the Options -> Preferences -> Message List menu. 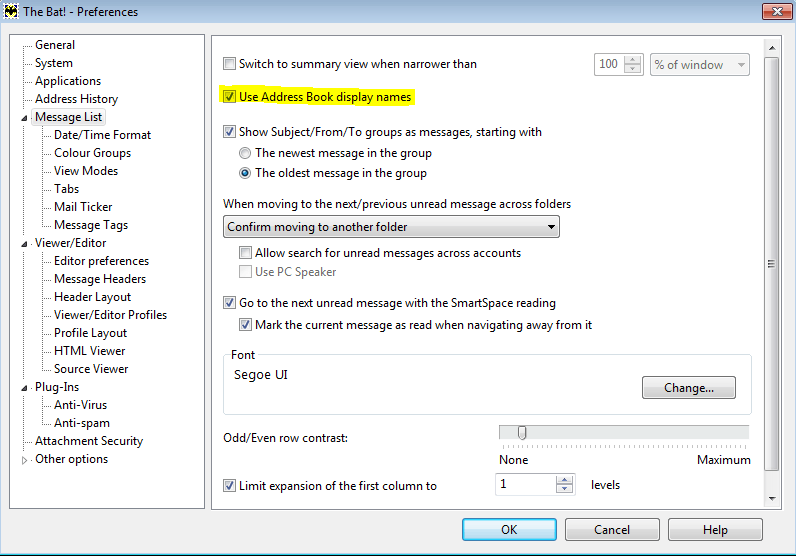 You can also add the From (Address Book) and To (Address Book) columns to the message list using the View -> Message List Columns menu and sort messages by sender’s or recipient’s display name. 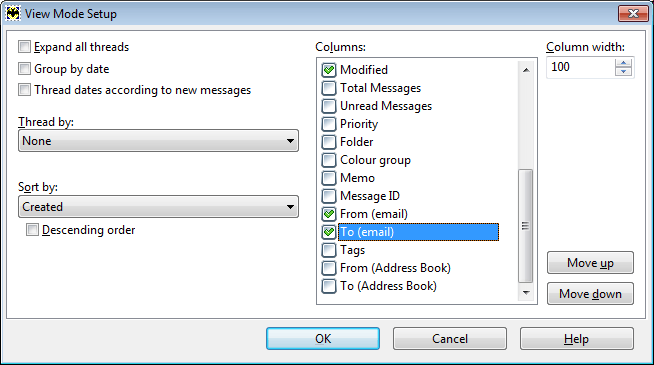 |
| Color Groups |
|---|
|
Creating a New Color Group Color groups can be assigned to messages, folders and accounts. To configure a new color group, access the Options -> Preferences -> Message List -> Color groups menu and click New. Specify the name and assign a unique ID in the General section. You can use different fonts for each color group: enable the "Change font to" option and choose a font in the drop-down menu. To change the font size, check the "Change font size to" box and set the needed value. 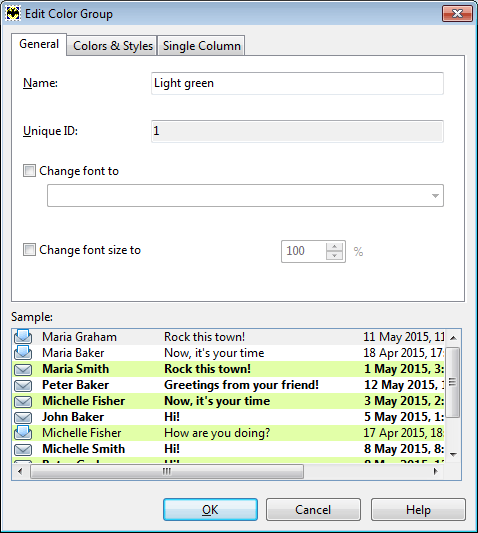
To specify colors and styles, switch to the Colors & Styles tab. Colors and styles can be defined for the following item:
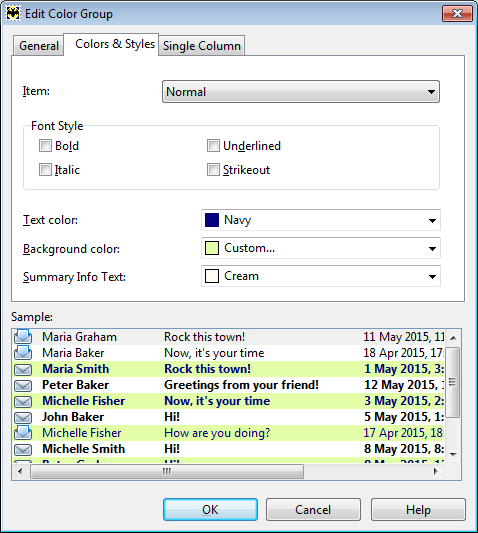
Each item can have its own font style – bold, italic, underlines or strikeout. You can change fonts of headers and message text. The color of the message text, background and summary info text can be defined for all the items. Summary info is displayed when using Summary View. To access the color groups’ settings you can also use the Folder -> Color Group -> Manage Color Groups or the Message -> Color Group -> Manage Color Groups menu. Assigning Color Group You can assign color group accounts, to folders in the account tree or to messages. To assign a color group to a message, use the Message -> Color Group menu or right-click the message and select Color Group. Using the Sorting Office you can automatically assign color groups to messages. Create a new filter, specify filter conditions and add the Flags -> Assign to color group action. Messages that satisfy the conditions will get the specified color group. To assign a color group to a folder, use the Folder -> Color Group menu or right-click the message and select Color Group. Color groups can be assigned to accounts as well: Right-click the account folder, choose Color Group and select the color group you would like to use. Filtering Using Color Groups You can sort out messages by the color group they have. You would need to create a new filter in the Sorting Office, add the "Color" condition and filter actions. For example, you can add the "Move the message to a folder" action to move all messages that belong to one color group to a specified folder. To sort messages in the list, access the View -> Display -> Advanced filtering menu and configure your filter. Choose the "Color" option and the name of the color group. Click OK to display messages belonging to this group. To display all messages again either press the Escape key or the Ctrl+= key combination. 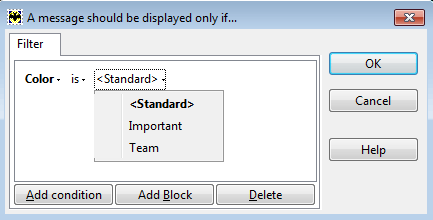
To sort messages by color groups in the message list, add the "Color group" column accessing the View -> Message List Columns menu: 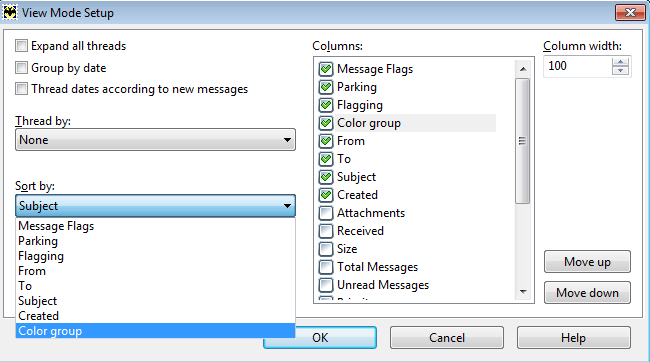
You can also create a message list tab to display messages of certain color groups. Access the Workspace -> Message List Tabs -> Create a new Tab menu, switch to the Filter tab and enable the Use Advanced filtering option. Select the Color condition and define the name of the color group. Once you click OK the new message list tab will appear below the message list. When you switch to it, The Bat! will display messages of the specified color group. 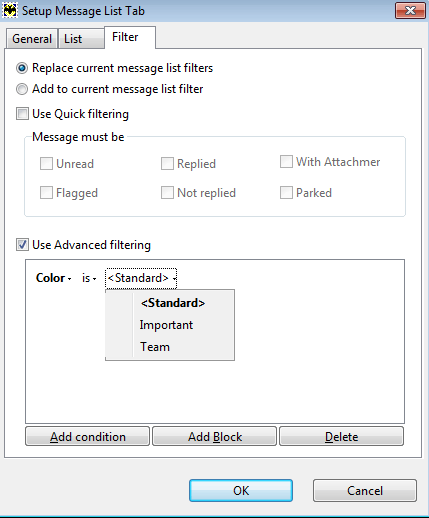
When assigning a color group to folders, a new folder tab appears below the account tree. This folder tab displays only those folders that belong to the specified color group. The order of the folder tabs can be changed in the Workspace -> Folder Tabs -> Configure Tabs menu. Color groups can be useful in virtual folders as well. To display messages belonging to one color group in a virtual folder, access its Properties and enable the "Advanced filtering settings" option in the Filter section. Select the Color condition and the name of your color group: 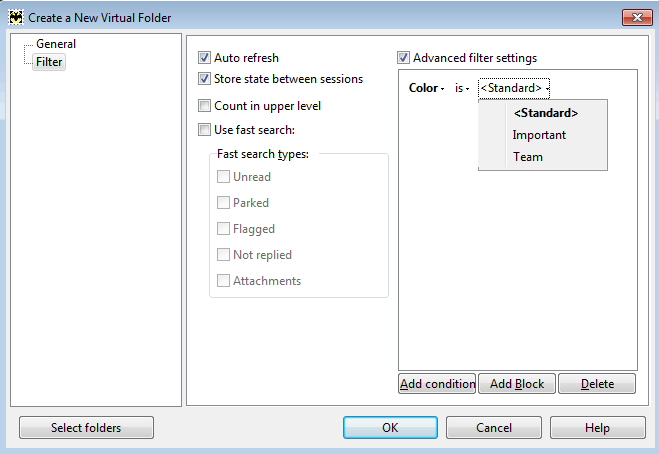
|
| Moving and Copying Messages |
|---|
|
Moving Messages To move a message into another folder select it and press the Ctrl+V key combination or use the Message -> Move to Folder menu. Start typing the first letter of the folder name, and the cursor will jump to the folder whose name starts with this letter. You can enter the folder name in the Quick Search field as well. It is possible to create a new folder to move messages into it: click the New button and configure your new folder. Select the needed folder and click OK to move messages. 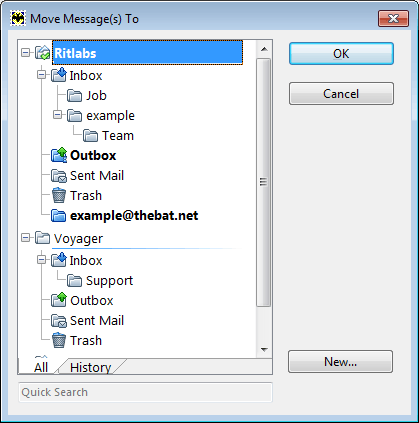
You can also move messages by dragging and dropping them. Copying Messages To copy messages select them and press the Ctrl+С key combination or use the Message -> Copy to Folder menu. In the new window, select the folder to copy messages into. You can use the quick search, create new folders and copy messages to clipboard using the respective button. The copied link can be used in the SmartBat or in the Scheduler. Another way to copy messages is dragging them into a folder while holding down the Ctrl key. |
| Attached Files |
|---|
|
The Bat! offers different ways of displaying and handling attachments. To change the display of the attachments list, right-click the attachment pane and choose the needed options from the View menu. 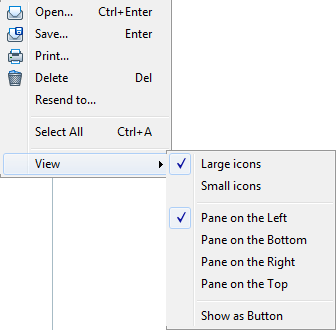
Attached files can be displayed as large or small icons. The pane can be placed on the Left, on the Right, at the Bottom or at the Top of the message auto-view section. Attached files can be shown as Button. If you select this option, the sign  will appear on the right-hand side of the headers pane. Click it to see the attachments. will appear on the right-hand side of the headers pane. Click it to see the attachments.
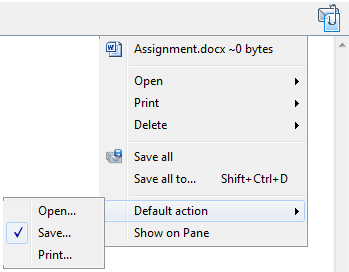
The default action is performed when you double-click the attached file. It can be the open, save or print action. Using the Workspace -> Attached Files menu you can change the display of attachments as well. The attachment pane can be hidden, if needed. Attachment Management There are a number of actions you can take for managing attachments. Right-click the attachment pane and select the needed action:
To save files, simply drag them with the mouse to a folder on your computer. You can resend attachments. If you select this action, the Editor window will appear, and the file will be attached to the message. If you select all attachments, the Save to a Folder option (Ctrl+S) will appear in the context menu. Using this option you will save all the attachments into one folder without the confirmation to save each file. If the message auto-view section is disabled, you can manage attachments in the message list: click the icon |
| Reading Message in a Separate Window |
|---|
|
When you double-click a message in the message list or select it and press the Enter key, The Bat! opens the folder containing this message in a separate window.
When reading a message in a separate window you can reply, reply to all (if the message has several recipients), forward or redirect the message to another recipient, print, save message to a file or delete it.
Sometimes messages cannot be read because of the wrong encoding. Using the View -> Character set menu you can change the encoding. If you select Auto-detect The Bat! will find and apply an appropriate character set. |
| Message Tags |
|---|
|
Tags are remarks that can be added to any message. They help sort and quickly find messages. Creating Tags You should create tags first. To create or edit tags use the Options -> Preferences -> Message List -> Message Tags menu. 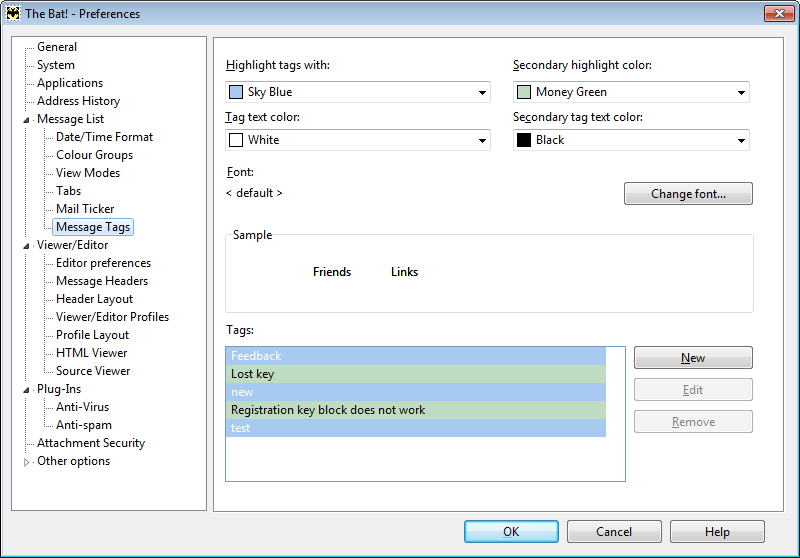
Click the "New" button to create a new tag. 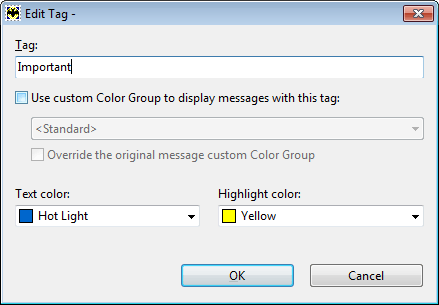
Specify the tag name, its text and highlight colors. If you enable the "Use custom Color Group to display messages with this tag" option and select a color group, the specified color group will be automatically assigned to messages containing this tag. If you enable the "Override the original message custom Color Group" option, the original color group of the message will be changed. Using the Options -> Preferences -> Message List -> Message Tags menu you can define the colors for new tags. When you create your first tag, the program uses the colors defined in the Highlight text with and Tag text color fields. The second tag will use the colors specified in the Secondary highlight color and Secondary tag text color fields. To change the font of tags, click the "Change font" button. Adding Tags to Messages Tags can be assigned both manually and automatically using filters. To add a tag manually, right-click a message and choose it from the list. 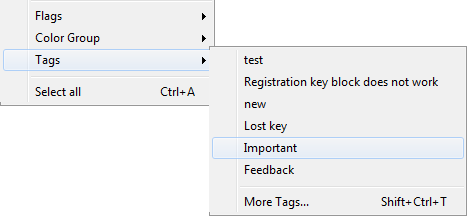
If the needed tag is missing from this list, click "More Tags…" (Shift +Ctrl+T). A new window will appear, there you can add a new tag entering its name and clicking Add. Tags that you already have are displayed on the left-hand pane. The Selected Tags field displays tags of the selected message. 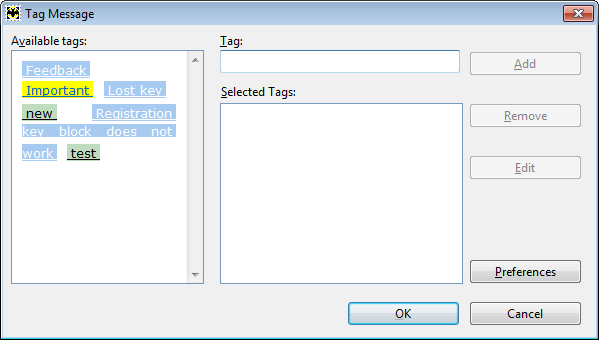
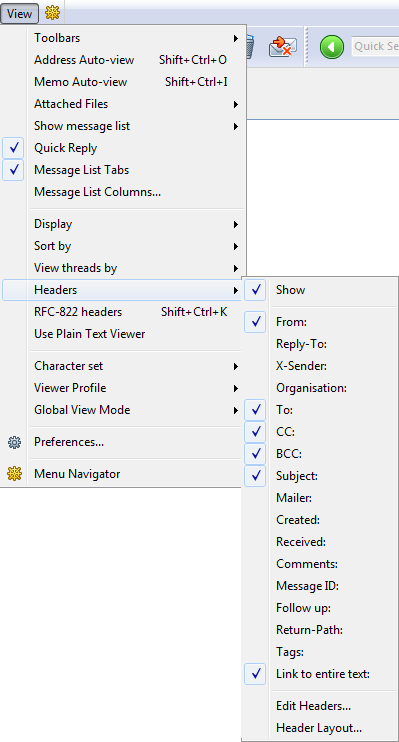
You can edit the existing tags changing their color. To delete a tag, click the "Remove" button. Tags can be added when you compose an email. Enable the Tags header using the View menu in the Editor and input tags in the respective field. 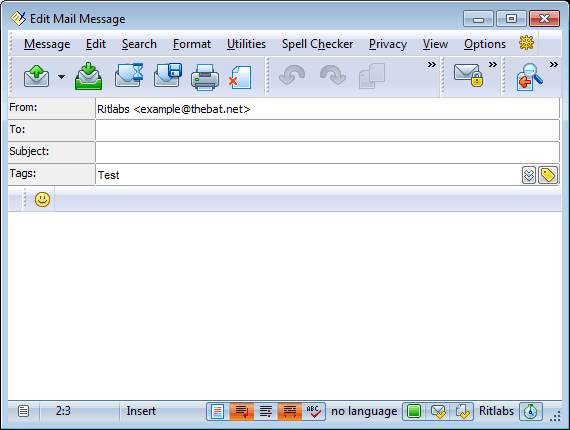
To see the list of the available tags click the icon  . .
Note: If you add tags in the editor, your recipients will see them too. Using filters you can assign tags to messages automatically. Such filters should contain the Tags -> Set Tags action. You can automatically clear tags as well. 
Tags are displayed in the Tags column in the message list. To add it, right-click a column and select Message List Columns (or use the View -> Message List Columns menu). The View Mode Setup window will appear - here you should check the Tags column. To change the order of your columns, use the Move up and Move down buttons. 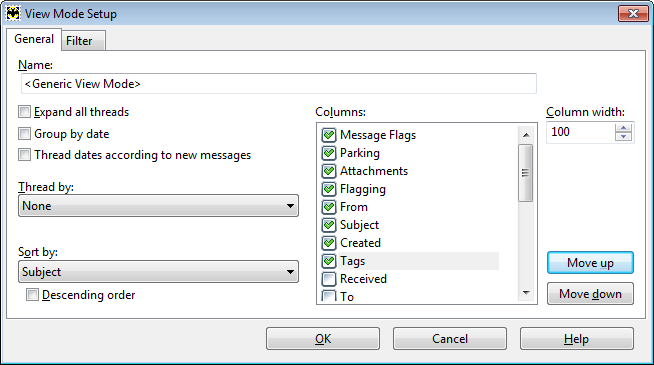
The Tag column can be added using the View -> Message List Columns menu. Filtering Using Tags Tags can be used as a filtering criterion. For example, you can move or copy messages containing certain tags to a specified folder. Such a filter should contain the Tags condition (available in POP3 accounts only). To quickly add a condition, press the Insert key. 
To sort messages in the message list using tags, access the View -> Display -> Advanced filtering and configure your filter. Click OK to display messages containing specified tags. To display all messages again either press the Escape key or the Ctrl + = key combination. 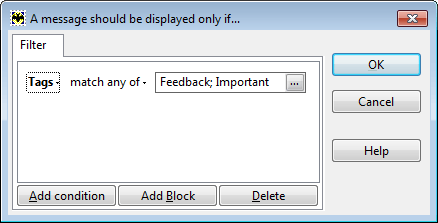
You can also create a message list tab to display messages containing certain tags. Access the Workspace -> Message List Tabs -> Create a new Tab menu, switch to the Filter tab and enable the "Use Advanced filtering" option. Select the Tags condition. After you click OK the new message list tab will appear below the message list. Once you switch to it, The Bat! will display messages containing certain tags. 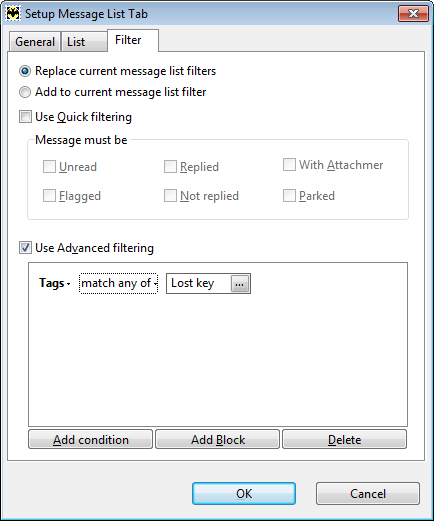
Tags can be used for filtering in virtual folders as well. To display messages with tags in a virtual folder, access its Properties and enable the "Advanced filtering settings" option in the Filter section. Select the Tags condition and define the needed tags: 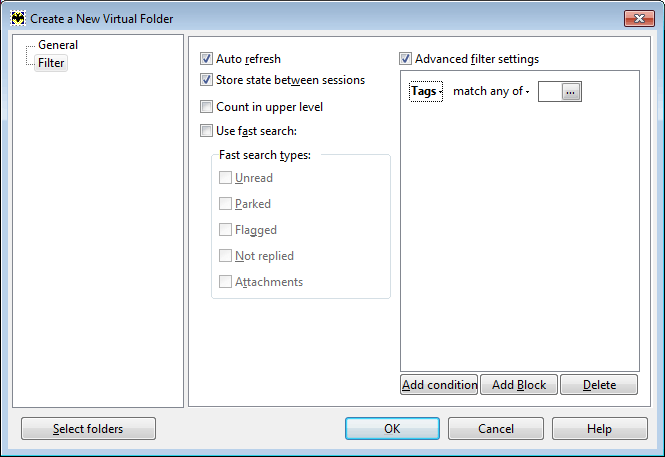
|


 - follow previous/next message in the folder
 - you can delete the message (middle icon) or delete it and follow previous/next message in the list