| Network |
|---|
|
Using the Options -> Network & Administration menu you can select the preferred method of connecting to the Internet and define privileges for accounts and user groups.
The Bat! supports two methods of connecting to the Internet: "Local Area Network or manual connection" or "Dial-up networking connection". You can change the connection method in the Network section. 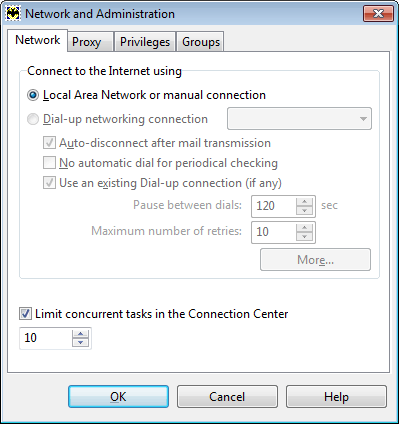
If the "Local Area Network or manual connection" method is selected, The Bat! uses an existing connection that was established either through your LAN or by manually dialing your Internet Service Provider. You can select the "Dial-up networking connection", if your LAN is not connected to the Internet and you are using a dial-up connection provided by your ISP. Each time The Bat! needs to open a TCP/IP connection, it checks whether or not the specified phone book entry is active (i.e. the established TCP/IP connection). If the entry is active, the TCP/IP sessions start, otherwise The Bat! automatically dials the phone book entry. In this case, multiple requests such as checking mail for all accounts and combined delivery (which requires two TCP/IP connections to be open at once: One for mail retrieval and another one for sending mail) will be handled correctly. Enable the "Auto-disconnect after mail transmission" option if you do not want to remain online after The Bat! has finished mail transfer. Select the "No automatic dial for periodical checking" option, if you do not want The Bat! to automatically dial your ISP. The "Use an existing Dial-up connection (if any)" option can be useful if you have several Internet Service Providers and want to use the established connection. The "Pause between dials" value determines the shortest interval between two consecutive dial out sessions. You can also set the "maximum number" of dialing retries. If you need to use another authentication data, click the "More" button and input user name and password in the new window. You can also "limit concurrent tasks in the Connection Center" if needed. On a slow Internet connection you might want one account at a time to check and download new mail, this way you will be able to read messages of an account while the others are in queue. |
The Bat! Help
|
Folders (6)
Sorting Office (4)
Macros (13)
XMP macros (9)
Checking Mail (2)
Reading Messages (7)
The Bat! Tools (8)
Address Book (7)
Backup (4)
Program Options (9)
|
Network and Administration
| Proxy |
|---|
|
The Bat! allows downloading images into the message text from remote servers using SOCKS proxy server. In the Proxy section you can configure the needed settings.
|
| Privileges |
|---|
If you want to share access to accounts between several users in one program, you may need to set access rights for particular accounts in the Privileges section.
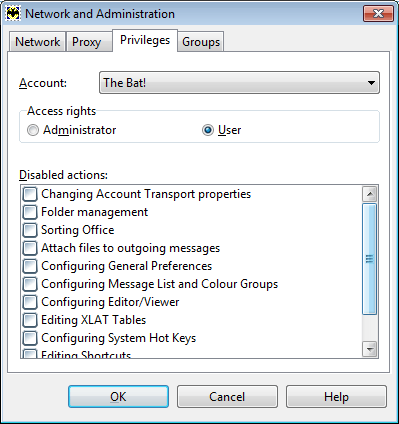
You can set Administrator or User access rights for each account. An Administrator has full access to all accounts and program settings. A User has limited rights. Users have access to their accounts only. The administrator specifies the actions that the users can perform. If you set user privileges for at least one account, a dialog box with user and password fields will appear on each program startup. To set access password for an account, use the Account -> Set Access Password menu. Note: If you have not set the access password for an account with administrator privileges and need to access this account, input the name of your account into the User field, and leave the Password field blank. If a User needs to access several accounts, the Administrator should group them together for this user. Note: If you enabled the on-the-fly message base encryption in The Bat! Profession or use The Bat! Voyager, you will not be able to set privileges. |
| Groups |
|---|
If a particular user wants to have access to several accounts, it is possible to define a group of accounts, which are displayed whenever that user launches The Bat! In the Groups section you can specify such account groups.
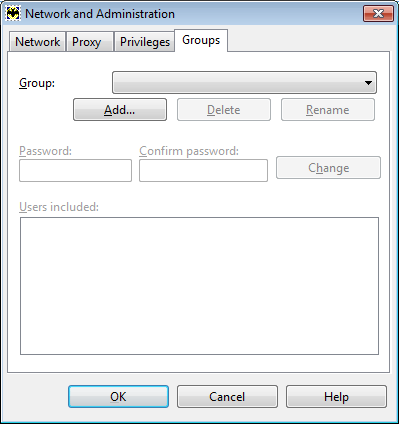
To log into The Bat! and have access to an account group, enter the group name and password in the window that appears at program startup. |