|
The Bat! allows you to create as many accounts as you need. Thus you can receive mail from all of your accounts and handle personal and business correspondence under one roof. Each account can have its own individual settings.
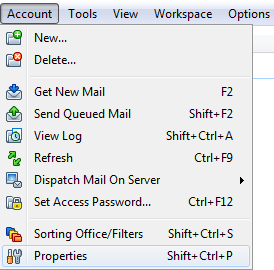
To change the properties of an account, select it and access the Account -> Properties menu (Shift+Ctrl+P).
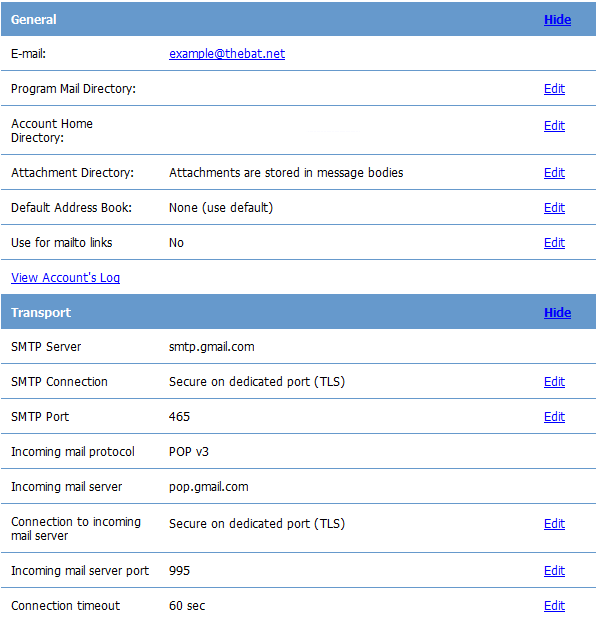
There is one more way to access the account properties: Select the account in the account tree and switch to the "Information" message list tab. You will see all the basic information on this account. Click the links to access the respective settings:
The "Account Properties" window appears. You will see the list of settings sections on the left side of this window.
-
General
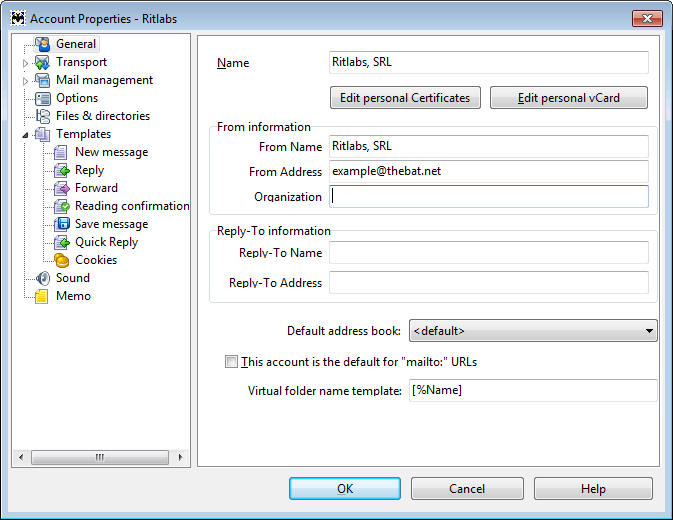
Here you can change the display name of the account and alter the information in the fields "From" and "Reply-To". You can choose the default address book from the dropdown list. Select the "This account is the default for mailto: URLs" box if you want to send emails from this account when clicking mailto: links.
-
Transport

You can change the following server settings in this section: server addresses, user, password, authentication options, ports (change ports if they are blocked), connection and delivery type, server timeout. Do not change this data unless it is needed. The Transport section has three subsections: "Postponed Sending" (time intervals), "Network" (Internet connection settings), "Protocol Logging" (enable/disable sending/retrieval protocols logging and define the location of the log files).
-
- Send Mail
-
- Enter the "SMTP server" address in the respective field.
-
- Choose the "connection" type: Regular, Secure to regular port (STARTTLS), or Secure to dedicated port (TLS). Depending on the connection type, the appropriate "port" number is automatically set.
-
- The "Use SMTP servers On-The-Go" option can be useful, if you cannot connect to your SMTP server. If you notice that the program does not send messages when you are on a trip, you might think that the SMTP port is being blocked by the local provider. Try sending emails using another SMTP server/port in this case. Enable the "Use SMTP servers On-The-Go" option, click the "Configure" button and add the settings of an alternative SMTP server. If you encounter such issues, choose an alternative server from the dropdown menu of the "SMTP server" field and try sending the messages again.
-
- Click the "Authentication" button and select the appropriate authentication option to access your SMTP server:
- Perform SMTP Authentication (RFC 2554) - Enable this option if your SMTP server supports authentication.
- Same user/password as for Mail Retrieval - If you enable this option, the program will use the same user and password as for the connection to the POP3/IMAP server.
- Use specific settings - If you use a different username and password for sending mail, choose this option and enter the respective data.
- Require secure authentication - Choose this option to use secure authentication methods: XOAUTH2, OAUTH2, CRAM-MD5, X-BIO. Make sure the server supports one of these methods. If the option is enabled, less secure methods, like LOGIN, PLAIN, MSN, NTLM, will be forbidden.
- Use “POP before SMTP” authentication - If your server requires receiving mail before sending, select this option.
- The following options are available in The Bat! Professional only:
- Store password on the token - The password used for connection to the mail server will be stored on the token.
- Enable Biometric Authentication (Requires TLS) - Enable this option if you use a token with biometric authentication.
- Cache it for … Minutes - Set a time interval, during which The Bat! will keep in memory your password or fingerprint.
-
- Receive Mail
-
- Input the POP3 or IMAP4 server address into the "Mail Server" field.
-
- Enter your mailbox name into the "User" field. This name may coincide with your email address or its part till the “@” sign.
-
- Input the password to access your mailbox on the server. If you leave this field blank, The Bat! will prompt for the password each time you try to receive new mail.
-
- Define the "connection" type and the appropriate port number.
-
- Click the "Authentication" button to set one of the following options:
- Regular - When this option is active, the password is transmitted to the server in clear text.
- MSN (NTML) - Select this parameter if you receive mail from MSN/Hotmail mailboxes.
- Compuserve (RPA) - This authentication method is used in the Compuserve network.
- MD5 APOP Challenge/Response (RFC-1734) - Choose this option to use APOP authentication.
- MD5 CRAM-HMAC Challenge/Response (RFC-2095) - Activate this parameter if your server supports CRAM authentication.
- Do not store password, prompt on mail retrieval - If you select this option, the password field will not be available, and you would need to enter the password each time you receive new mail.
- The following options are available in The Bat! Professional only:
-
- Token CRAM-HMAC Challenge/Response - If you intend to use a token for authentication, select this parameter.
- Enable Biometric Authentication (Requires TLS) - Activate this option if you use a token with biometric authentication.
- Cache it for … Minutes - Set a time interval, during which The Bat! will keep in memory your password or fingerprint.
- Server Timeout - A period of time during which the program maintains the connection with the server. If no answer comes from the server, The Bat! disconnects from it. You can set the server timeout value using the Account -> Properties -> Transport menu.
-
- Choose between two delivery types – "Immediate" (the program sends the email immediately after the Resend command) or "deferred" (the program puts the email into the Outbox after the Resend command).
-
- When the "Combined delivery (send+receive)" option is enabled, The Bat! performs both actions simultaneously.
-
-
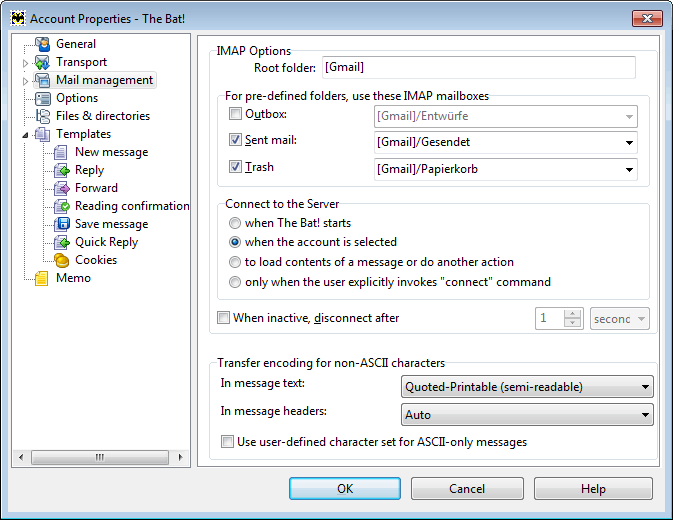
Mail Management
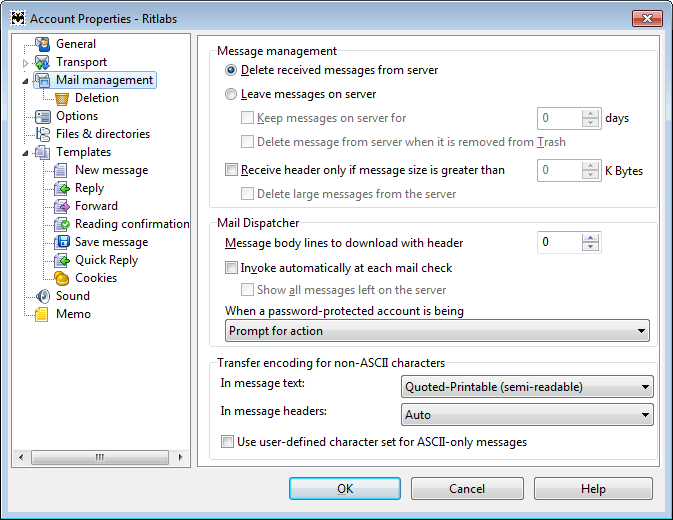
If you intend to "delete received messages from server", make sure you enable the respective option. Otherwise, all the received messages will be stored on the server. If you "leave messages on the server", you can determine how long they will be stored. You can set the maximum message size if you enable the "Receive header only if message size is greater than … Kbyte" option. To delete larger messages from the server, select the respective check box. Here you can also configure the settings of the Mail Dispatcher and the encoding for non-ASCII characters in message text and headers.
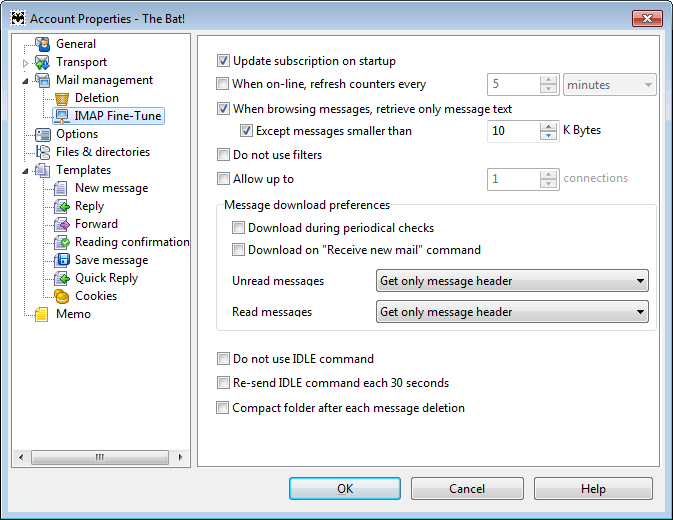
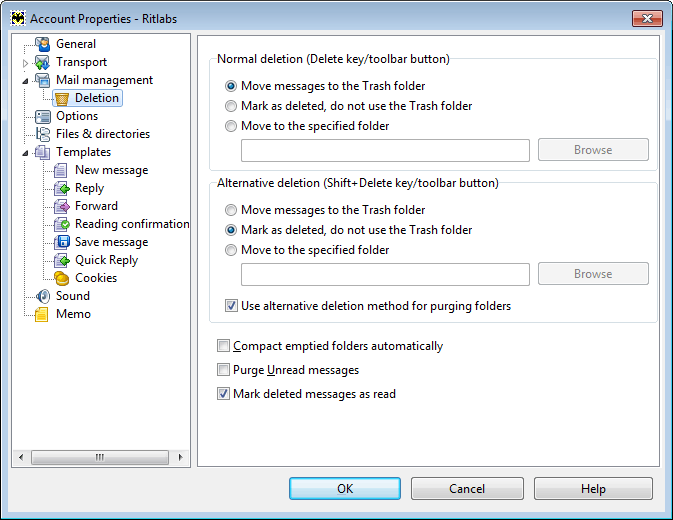
The "Mail management" section, which you can see on the left-hand pane, has a "Deletion" sub-section.
By default, you move messages to the Trash folder by pressing the "Delete" key. Alternatively, you can delete them immediately or move them to a specified folder.
"Alternative Deletion" is performed after pressing the Shift+Delete key combination. Select the "Use alternative deletion method for purging folders" check box to take the assigned action when using the Folder -> Purge command.
To compact folders after they were emptied, enable the "Compact emptied folders automatically" option.
If the "Purge Unread messages" option is enabled, the program deletes old unread messages.
To "mark deleted messages as read", select the respective check box.
 -
Options
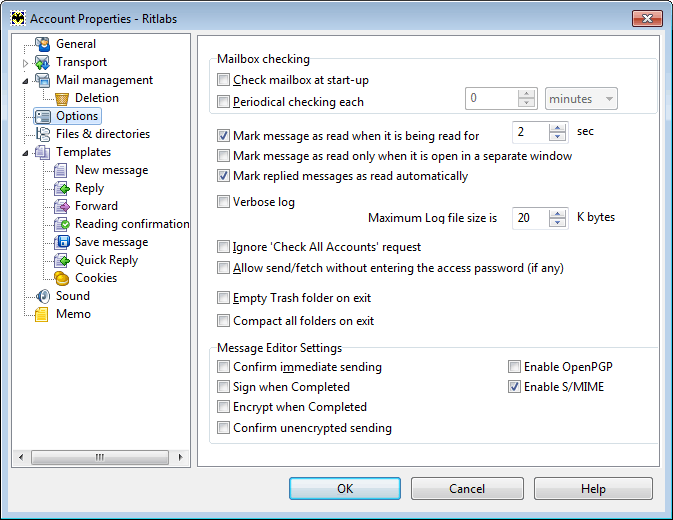
Here you can configure automated "mailbox checking" (e.g. you can check mailbox at start-up or every 10 minutes) and define, when the message should be marked "as read". The Bat! can automatically "empty Trash folder" and "compact all the folders on exit", which will help you save space on your drive. You can configure some of the "message editor settings" in this section as well.
- Files & Directories
-
- To change the settings of the attachment management, access the Account -> Properties -> Files & directories menu.
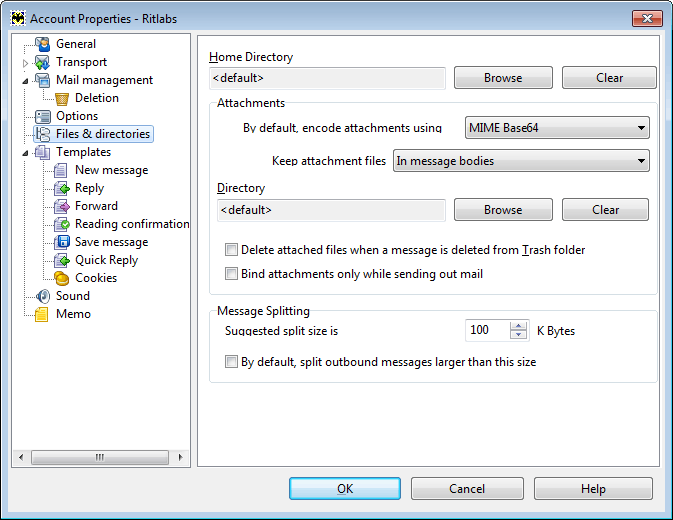
- Home Directory is the main directory for your account folder. If the value is set to <default>, The Bat! creates a directory in its working directory using the name of this account.
-
- Attachments
-
- Choose the default encoding type for your attachments from the dropdown menu on the left side of the "By default, encode attachments using" field. It can be Base64 (MIME standard) or UU Encoding.
-
- You can keep your attachments either in the message bodies or separately in a special directory. If you choose to store them separately, the program will automatically move attachments into a specified directory once you receive a message that contains attached files.
-
- Beware: If you store attachments separately in a special directory and move emails to another account, attached files will not be moved anywhere.
-
- If the "Delete attached files when a message is deleted from Trash folder" option is enabled, attachments will be removed from their directory once you delete the messages. This will certainly save space on your computer.
-
- If you select the "Bind attachments only while sending out mail" check box, the files will be attached after you use the “Send” command. This allows you to continue editing on attachments before sending them.
-
- Message Splitting
-
- The Bat! allows you to automatically split large messages into smaller parts. This is quite useful if there are limits on the outgoing message size. Note that your correspondent needs The Bat! or another email client that supports RFC-1521 to put such message together again.
-
- "Suggested split size" is the size The Bat! will split messages into.
-
- Select the "By default, split outbound messages larger than this size" check box to split the outgoing messages which size is larger than the defined value.
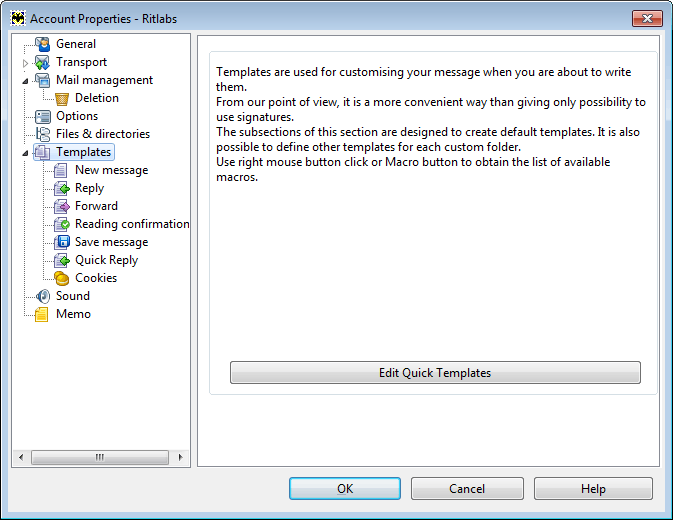
Templates
-
Certain parts of the message repeat themselves in each email. Templates allow one to prepare a standard text in advance and may help you save the time used for typing. You can define templates for new messages, replies and forwarded messages, as well as for reading confirmation, saved message and cookies.
The default template for new messages looks like this:
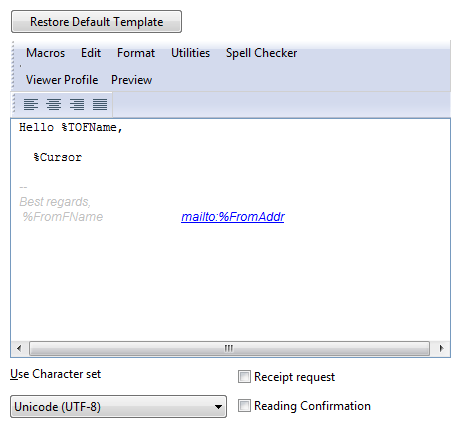
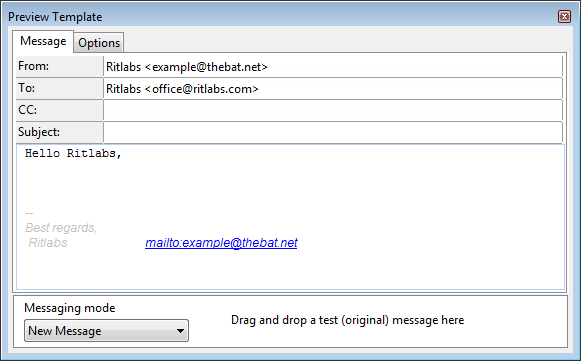
This template inserts a greeting that includes the first name of the recipient (the %TOFName macro) and a signature containing the first name of the sender (the %FromFName macro) and his email address (the %FromAddr macro). The cursor is automatically placed at the position defined by the %Cursor macro. You can configure the templates using text and macros. It is also possible to change the format of the template (Plain text or HTML), character set and add receipt request or reading confirmation. You can preview the message you’ll compose using this template to define whether it meets your demands or not. Here is an example of an email based on this template:
- Cookies
-
- Cookies are funny or wise phrases that can be added to greetings or signatures. If you use the %COOKIE macro in your template, The Bat! inserts a cookie randomly into your message text.
-
- Cookies can be stored in The Bat! You can add them using the Account -> Properties -> Templates -> Cookies menu. You can also use an external text file with cookies. Click the "Add from file" button and point to the file with cookies. Any cookie will be inserted in one line unless you use \n for line break.
-
- To add cookies from an external file you should add the file path in the %COOKIE macro, e.g. if you use the %COOKIE="C:\Bat\Quotes.txt" macro, the program inserts a cookie from the Quotes.txt file, located in the С:\Bat folder.
-
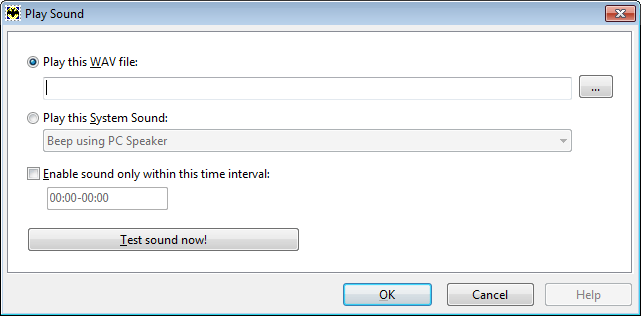
Sound
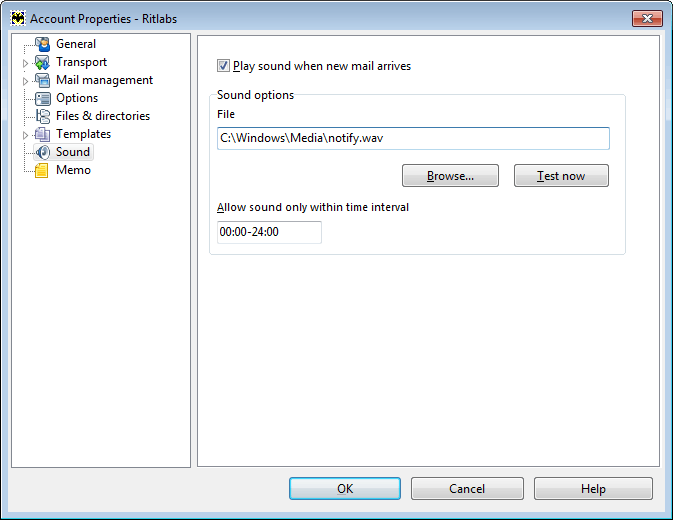
In the Sound section you can choose an audio file (.WAV) and define it as your new mail notification. You can set the time interval during which the mail notification should be played, for example, during working hours only.
This section is not available in IMAP4 accounts, however you can still play sounds there too. To play one and the same sound for all messages or different sounds for particular messages you need to set up filters. The same applies not only to IMAP4 accounts, but to POP3 and EWS accounts as well. From the main menu, select Account -> Sorting Office/Filters. Create a new filter for the incoming mail, add the action "Play a sound" and choose the audio file. You can set the time interval during which the mail notification should be played if you enable the "Enable the sound only within this time interval" option.
Tip: remember to enable the "Continue processing with other filters" option under the Options tab. Move the filter to the first position in the list as the filtering goes top-down.
Using the filters as described above, you can configure custom notification sounds for individual contacts, so The Bat! will play different sounds for different people, based on names or addresses, each time an email arrives from them.
|