| Account Tree |
|---|
|
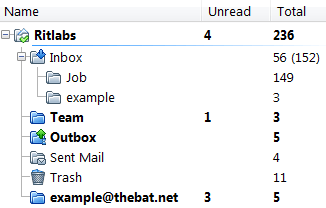
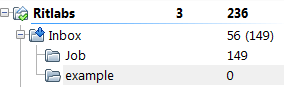
The Bat! stores messages in folders that are displayed in the account tree.
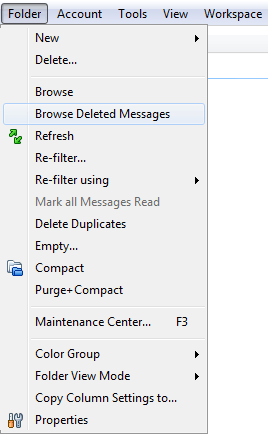
Once you add an account, The Bat! creates four default folders: Inbox, Outbox, Sent Mail and Trash. You will not be able to delete them. When you delete an email using the "Delete" key, the program moves it to the "Trash" folder. While this message is there, you can restore it. If you delete a message from Trash, you will not be able to restore it, though there is one exception: if you have not yet compacted the folder, you can view it using the Folder -> Browse deleted messages menu. The program will display the deleted message strikethrough both in the Trash and in its source folder. To restore it, select it and press the "Delete" key.
You can create sub-folders with their own structure within the default folders. Filters will help you automatically move them into different folders and organize incoming or outgoing emails.
|
The Bat! Help
|
Folders (6)
Sorting Office (4)
Macros (13)
XMP macros (9)
Checking Mail (2)
Reading Messages (7)
The Bat! Tools (8)
Address Book (7)
Backup (4)
Program Options (9)
|
Folders

| Sorting Filters |
|---|
|
The Bat! offers a filtering system that will help you automatically sort out and otherwise organize your daily correspondence. This filtering system is called Sorting Office. The Sorting Office is a tool that you can use for performing some other tasks as well. To access the Sorting Office, use the Account -> Sorting Office/ Filters menu (Shift+Ctrl+S).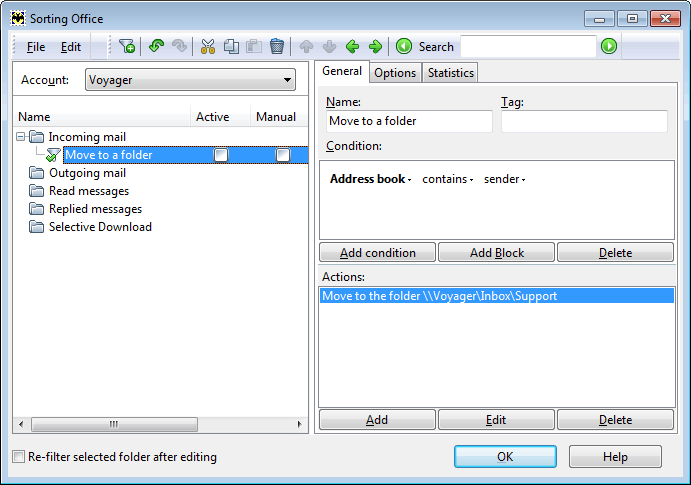
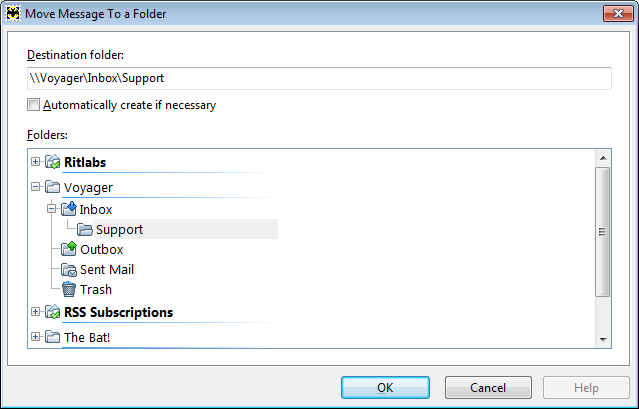
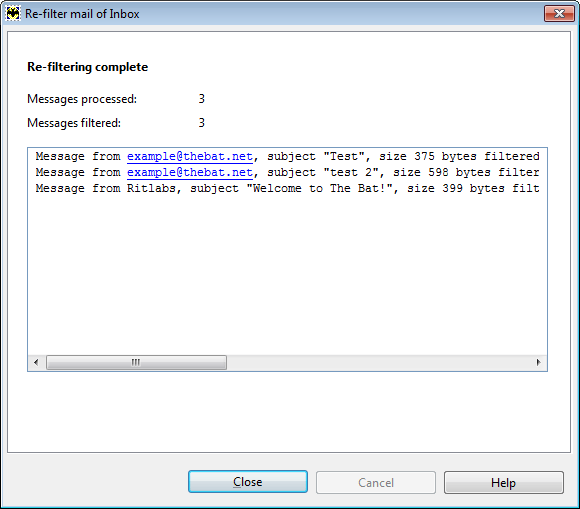
First select a category - incoming mail, outgoing mail, read messages, replied messages or selective download. The first four categories are meant for sorting tasks, the last one – for combating spam. To create a new filter, select the needed category on the left-hand pane and use the File -> New Filter menu or click the icon If you have several accounts, you should choose the account in which your filter will be active or define it as a common filter. Specify the filter name, add a condition by clicking the "Add condition" button and an action by clicking the "Add" button in the Actions pane. The "Move to a folder" filter which you see on the screenshot moves all incoming messages to the Support sub-folder if the sender is in the address book. To move messages to a folder that does not exist, remember to check the "Automatically create if necessary" box.
The filter performs actions only when it is active. New filters are active by default.
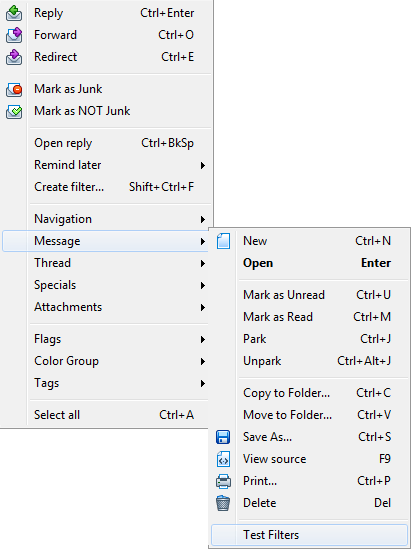
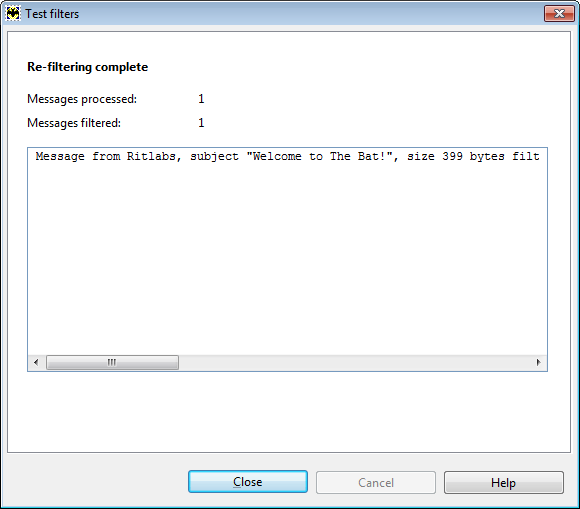
Choose filter category and click OK. Your filters will trigger and you will see results in a new dialog box.
|

| Folder Properties |
|---|
|
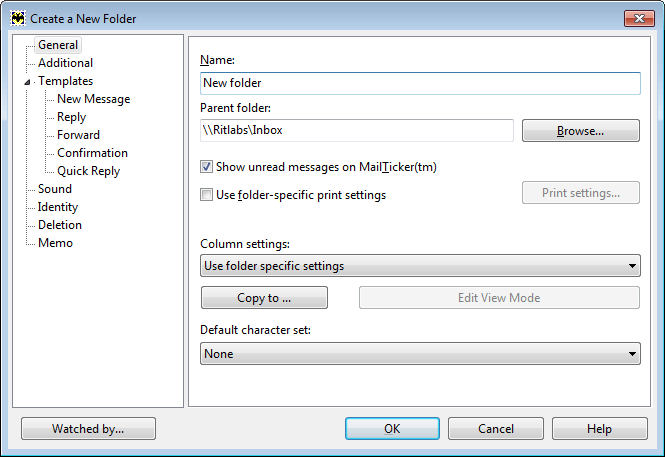
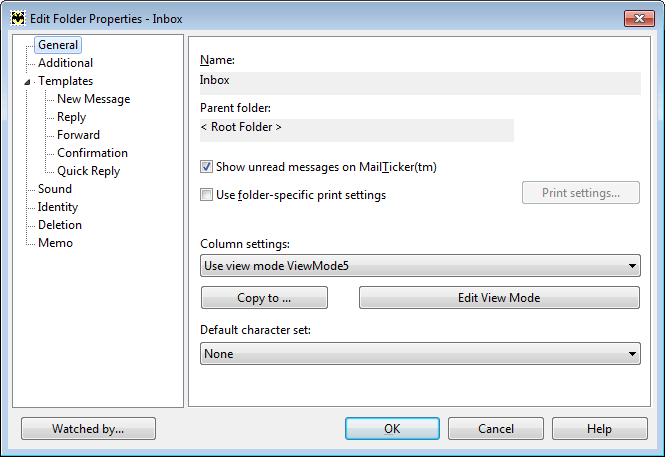
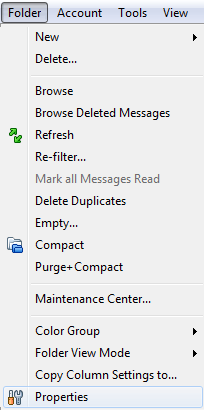
To access folder settings, right-click the folder and use the Folder -> Properties menu (Alt+Enter) or choose "Properties" in the Folder menu.
Folder settings are divided into the following sections: General, Additional, Templates, Sound, Identity, Deletion and Memo.
In the General section you can:
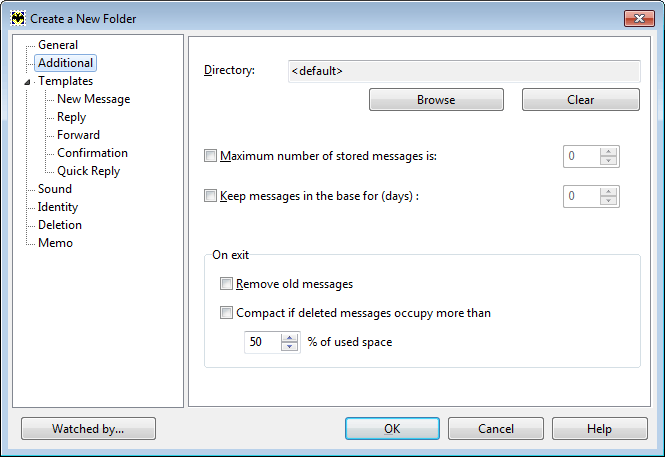
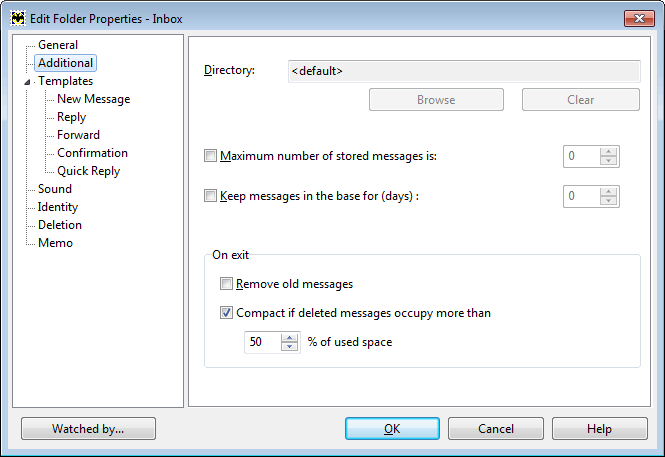
In the Additional section you can:
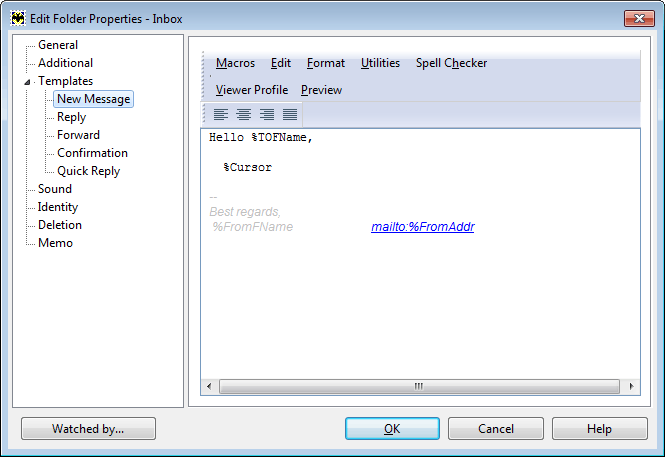
You can change the following folder Templates:
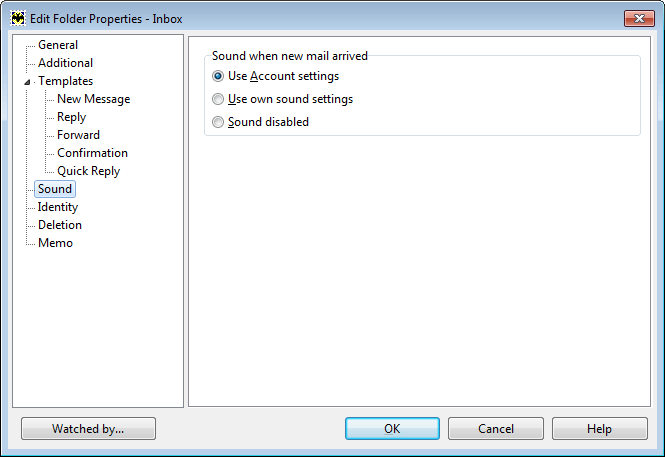
To set the melody that will be played when a new mail arrives in this folder, access the Sound section. The program uses the same sound as you set in the account settings, however you can change it and use own sound settings or disable sound for this folder. If you choose your own sound settings, then you can define the time interval during which it will be played.
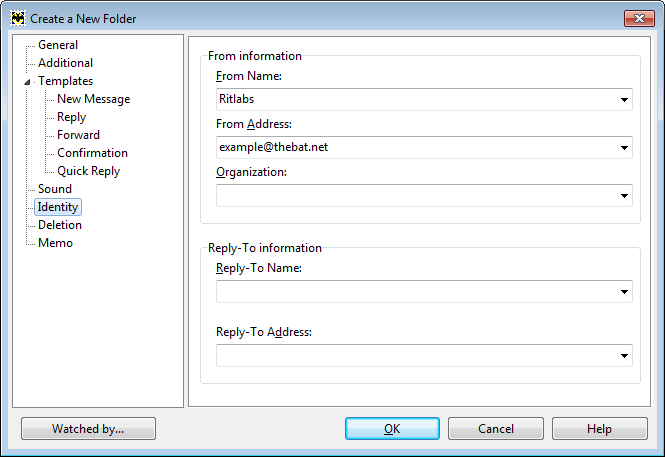
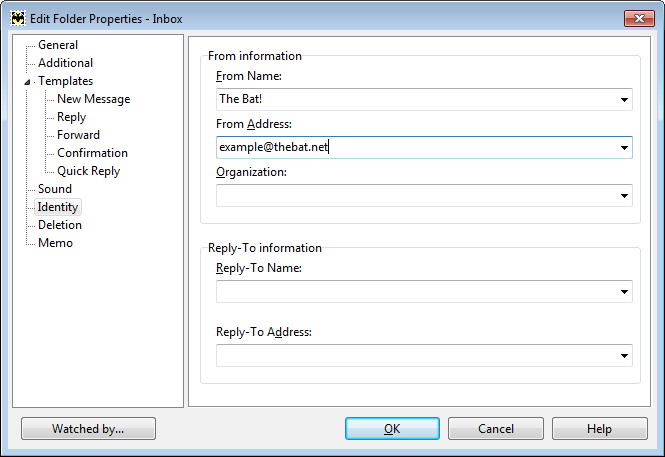
Set the name and the email address that your recipients will see in the "From" and "Reply-To" fields in the Identity section. For example, if you use the folder for personal correspondence, you can remove the organization you work for.
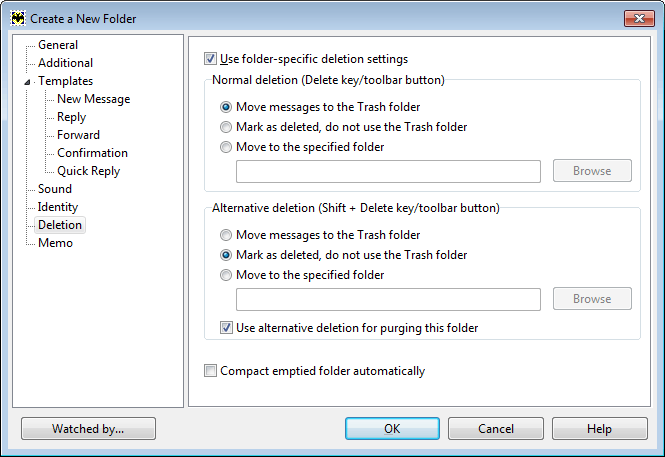
To set folder-specific deletion settings, open the Deletion section. By default, if you press the Delete key, messages are moved to Trash, and when you press the Shift+Delete key combination the program deletes messages immediately, without placing them to Trash. Such alternative deletion is applied to old messages that are stored longer than the period you set in the Additional section.
|

| Maintenance Center |
|---|
|
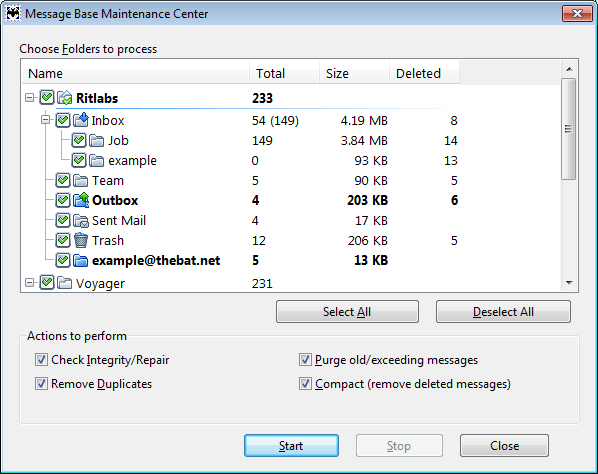
It will take you much time to compact each folder manually. The Maintenance Center will help you compact all the folders of your accounts at once. To open it, access the Folder -> Maintenance Center menu. 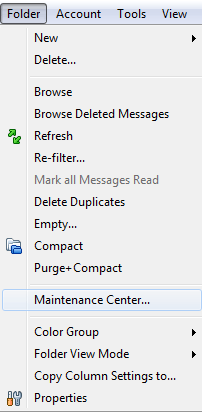
A new window will appear where you can see the information on each folder, such as folder size and total number of deleted messages. You can select all the folders or only certain ones.
You can perform the following actions:
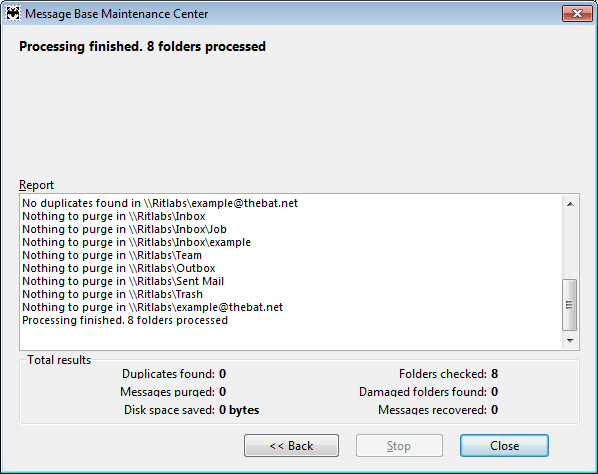
Select the actions you would like to have performed and click the "Start" button. To stop the process, use the "Stop" button. The speed of the process depends on the message base size. Finally, you will see a dialog box with the results.
|
| View Modes |
|---|
|
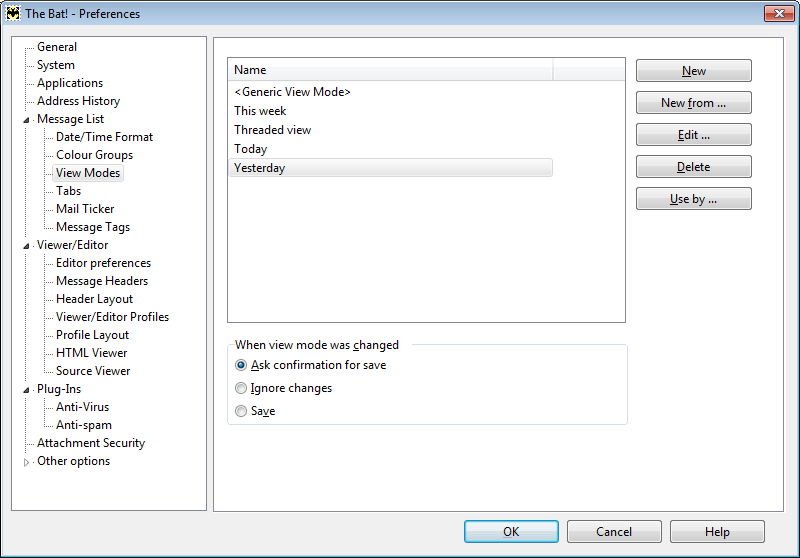
View modes allow you to change the message list display in different folders. The program has five default view modes:
You can edit the existing view modes or create new ones. To configure view modes, use the Options -> Preferences -> Message List -> View Modes menu. You can open this dialog when right-clicking a folder and choosing the Folder View Mode -> Manage View Modes menu.
Choose the action that will be performed upon changing the view mode in the message list: "Ask confirmation for save","ignore changes" or "save". So if you manually change the column width, you will get a confirmation dialog box if the first option is selected. If you choose the second option, the changes will not be saved. In the third case, the program will save changes without confirmation.
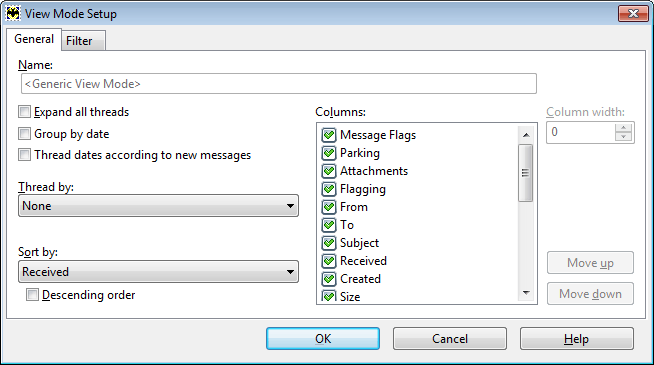
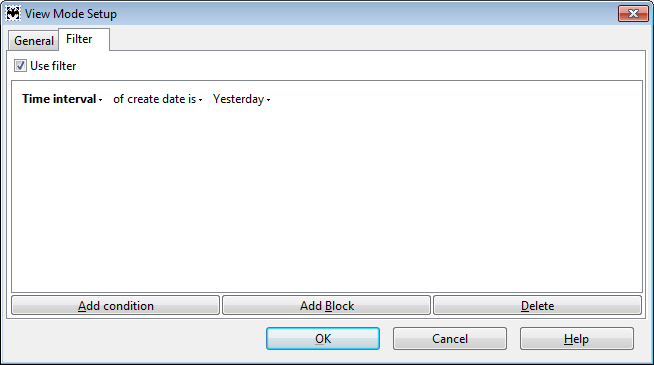
When you create or edit a view mode, you will get the "View Mode Setup" window. Give the view mode a name; if you edit a view mode, you can change its name. If you select the "Group by date" check box, messages will be grouped into the following threads: today, yesterday, this week, last week, etc. You can define by which message headers your messages should be threaded:
Threads by references are considered to be the most reliable and handy, though the other ones will also be useful for certain goals.
|


| Virtual Folders |
|---|
|
Virtual folders help you simplify your workflow, especially when you use several accounts. Virtual folders display only those messages that satisfy the conditions you set. A virtual folder can be displayed as an account folder/sub-folder or as a common folder.
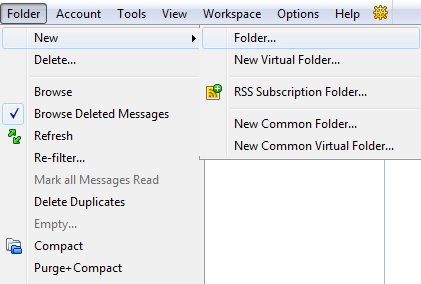
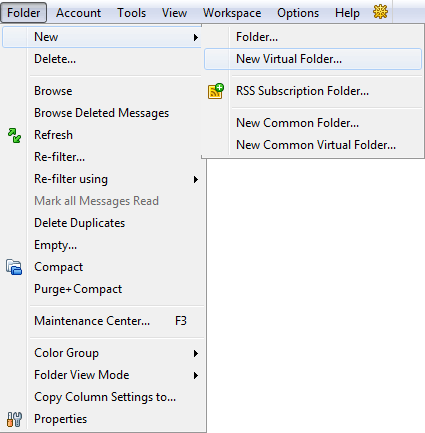
To create a virtual folder, use the Folder -> New -> New (Common) Virtual Folder menu. You can access this menu from the context menu of the account tree as well.
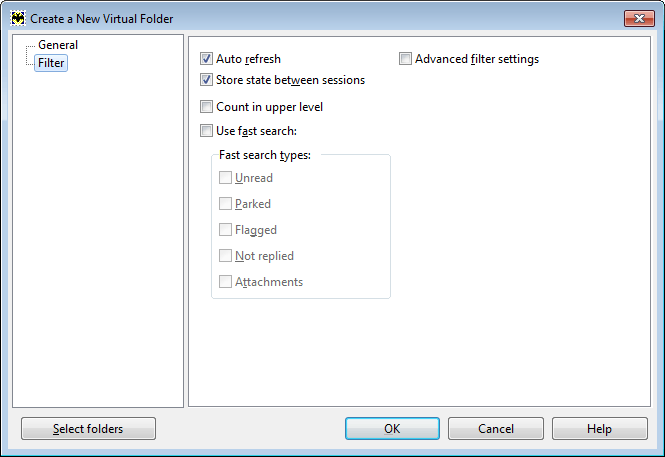
The settings in the General section of the "Create a New Virtual Folder" window are identical to the settings in the same section of the "Create a New Folder" window. Go to the Filter section to configure filter settings.
If you check the "Auto refresh" box, the virtual folder will show the current state of the messages. Mark the "Store state between sessions" check box to make The Bat! remember the messages displayed before exiting.
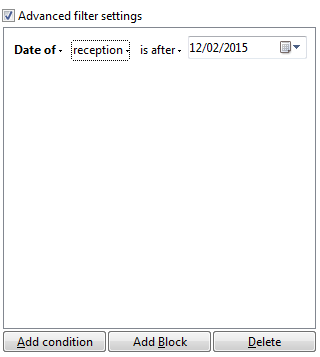
Enable the "Use fast search" option to set your search criteria. You can watch unread, parked, flagged not replied messages or messages that contain attached files. If you need to add other criteria, enable "Advanced filter settings" and configure the filter just as you do it in the Sorting Office.
Click ОК to start choosing the folder your new virtual folder will show messages from. After you choose them, click OK to finish creating the new virtual folder.
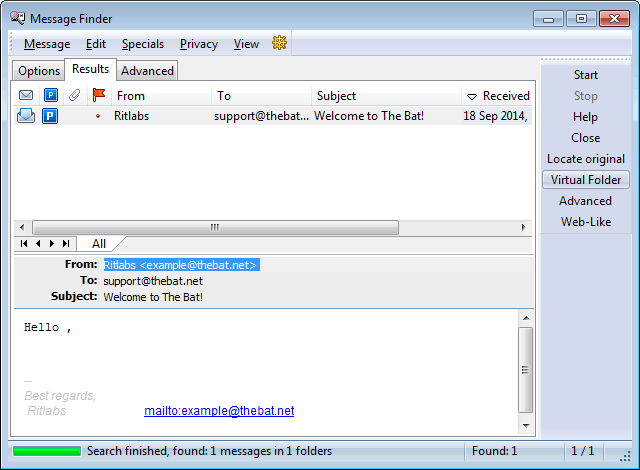
You can create virtual folders from the "Message Finder" window as well. Open it using the icon |
 and enter the search criteria. You can directly create a virtual folder from the results by clicking the "Virtual Folder" button. Search conditions will turn into a filter of the virtual folder. You can change them, if needed.