The Bat! Help

Folders (6)
Macros (13)
Backup (4)

Sorting Office

  • Creating, Editing and Deleting Filters
  • Selective Download
  • Filter Actions
  • Creating Filters Quickly

  • Creating, Editing and Deleting Filters

    To organize your daily correspondences and get to what is most important first straight away, you might need to filter messages. The Bat! offers a filtering system that will help you automatically sort out and otherwise organize your daily correspondence.

    To access the Sorting Office, use the Account -> Sorting Office/ Filters menu (Shift+Ctrl+S).

    First select a category - incoming mail, outgoing mail, read messages, replied messages or selective download. The first four categories are meant for sorting tasks, the last one – for combating spam. To create a new filter, select the needed category on the left-hand pane and use the File -> New Filter menu or click the icon .

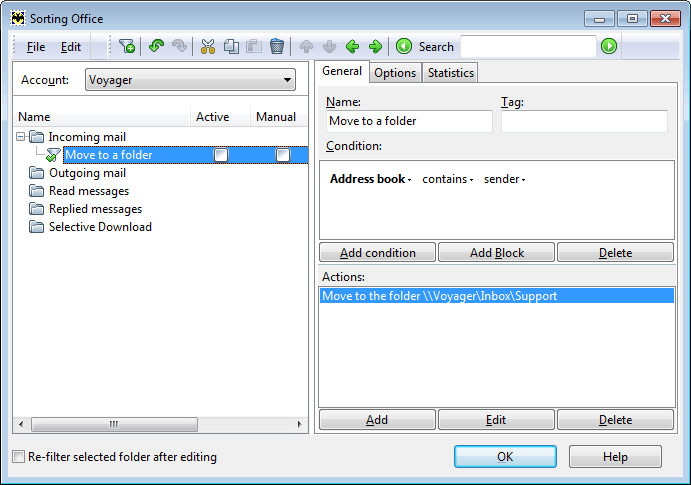
    If you have several accounts, you should choose the account in which your filter will be active or define it as a common filter. Specify the filter name, then add a condition by clicking the "Add condition" button and an action by clicking the "Add" button in the Actions pane.

    The "Move to a folder" filter which you see on the screenshot moves all incoming messages to the Support sub-folder, if the sender is in the address book. To move messages to a folder that does not exist, do not forget to check the "Automatically create if necessary" box.


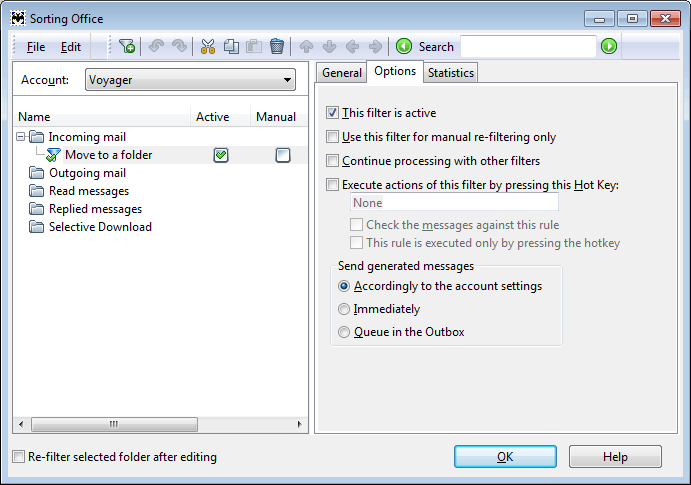
    To specify additional filter settings, open the Options tab. To quickly enable these options, set check marks in the respective boxes in the filter list pane.


    A filter performs actions only when it is active. New filters are active by default. 

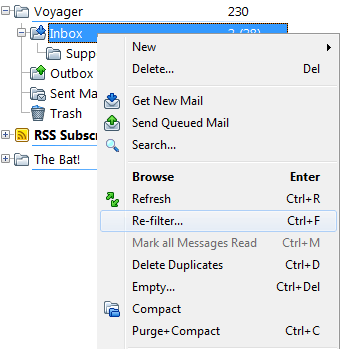
    Use this filter for manual re-filtering only – If you check this box, you can trigger this filter using the Folder -> Re-filter menu and selecting the "Manual filters only" check box. This filter will not sort out the messages automatically.

    Continue processing with other filters – If a message satisfies a filter condition, The Bat! stops processing this message and does not check the other filters. Sometimes, it is necessary to apply several filters to one message. If this is the case, enable this option. This can be useful for filters that set a color group or a flag, and then pass this message to another filter which moves it to the specified folder.

    Execute actions of this filter by pressing this Hot Key – To assign a hot key for a filter, enable this option. This is an alternative way to trigger a filter. To trigger a filter only using the Hot Key, enable the " This rule is executed only by pressing the hotkey" option. The filter will apply the action to any message when using the Hot Key, even if it does not satisfy its conditions. To apply action only to those messages that satisfy filter conditions, select the "Check the messages against this rule" box.

    Some filters create outgoing messages. Specify when the program will send these messages selecting one of the possible variants: "Accordingly to the account settings", "Immediately" or "Queue in the Outbox".

    To see filter statistics, switch to the Statistics tab. You will see how many times the filter was tested and triggered as well as its efficiency.

    You can edit existing filters. To edit a filter, select it and simply change its conditions and/or actions. To check a filter, you should test it: right-click a message that satisfies its conditions and select "Test Filters".

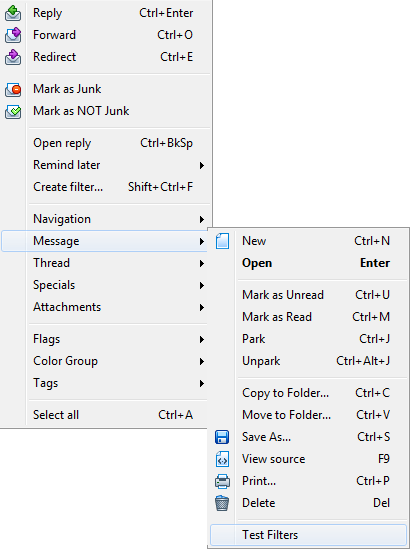
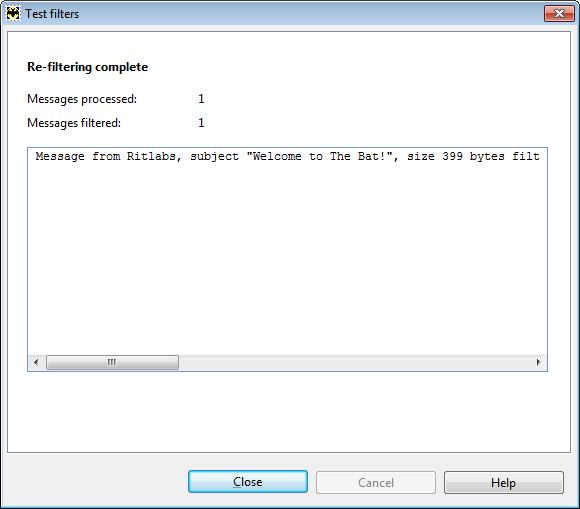
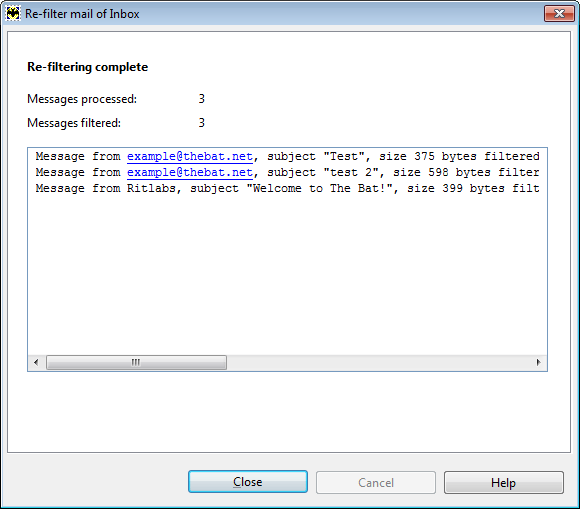
    A new dialog box appears. Select the filters to test and click OK. You will see the results: if the number of processed messages coincides with the number of filtered messages, the filter performs the actions correctly.


    You can use filters for re-filtering of the already downloaded messages. Right-click a folder in the account tree and select the "Re-filter" option (Ctrl+F).


    Choose filter category and click OK. Your filters will trigger and you will get the results in a new dialog box.


    If you do not need to use a filter anymore, you can delete it by pressing the Delete key or right-clicking it and selecting the "Delete" option in the menu. Alternatively, you can deactivate it so that it does not automatically trigger. This way you will preserve the filter and be able to activate it in future if needed.


    0  

    Selective Download

    You can choose messages to delete or leave on your POP3 server by setting up respective filters in the Selective Download section of the Sorting Office. These filters can be used for protection against viruses and spam.

    Select the Selective Download section and create a new filter. Specify the filter name and add its conditions. Conditions are limited as much of the information about messages is available only after message download.


    Choose One of the Actions:
    • Delete immediately – The message will be deleted directly from the mail server without being downloaded
    • Ignore – The message will not be downloaded in The Bat!, however it will remain on the server
    • Ignore and mark as read – The message will be marked as read on the server, The Bat! will no longer treat it as a new message

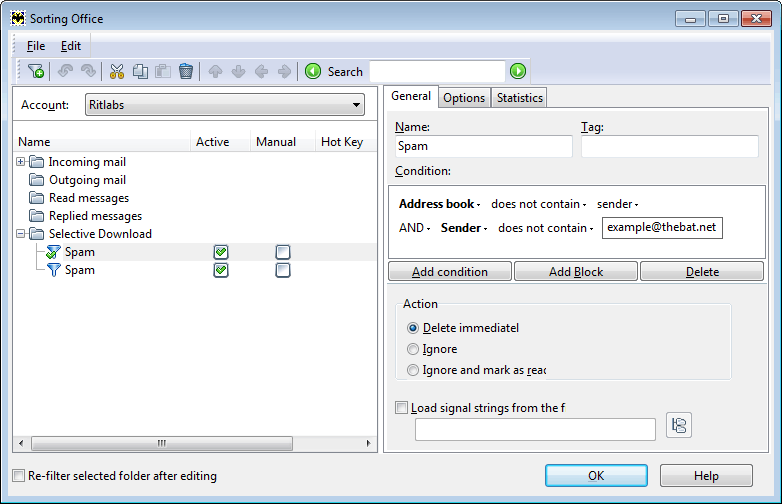
    You can add as many filters as you need. Unsolicited messages are never addressed personally, so if you get a message from an unknown sender that is not addressed to you personally, it might be spam. The following filter deletes such messages immediately:

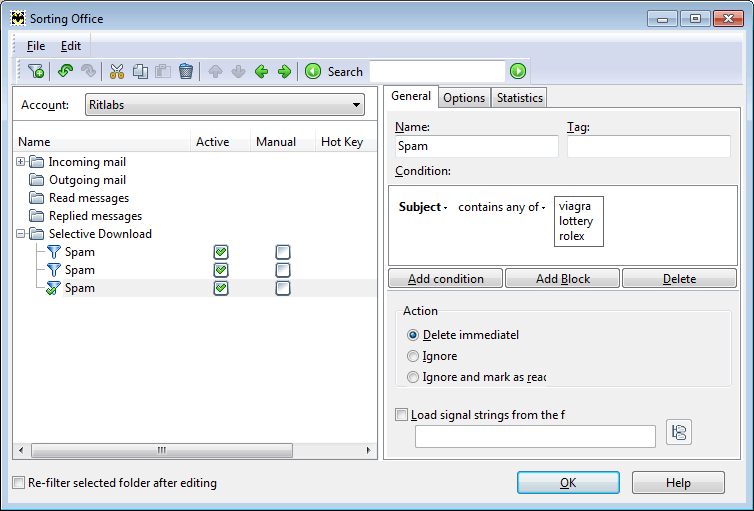
    The Bat! can delete messages depending on their subject line. Filter out common spam words that get into your mailbox, e.g. Viagra or lottery. Add these words to the filter condition:

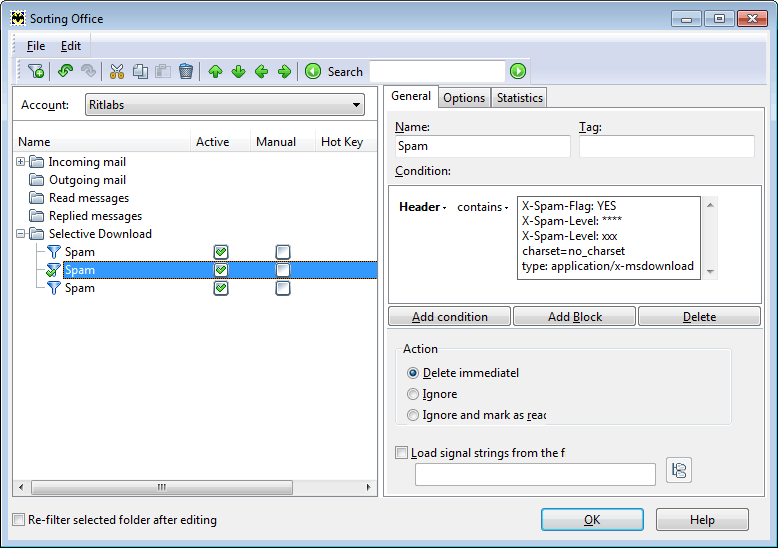
    Some mail servers recognize spam using the SpamAssassin program and add certain headers to such messages. Using these headers in the filter is an effective way to combat spam.


    Selective download filters can also be useful if you do not want to get messages from certain senders. Add the "Sender contains …" condition and specify the action to perform.

    To add conditions from a text file, use the "Load signal strings from the file" option. This file can be created in any text editor; strings (conditions) should be separated with paragraphs. If you already have a black list, simply add it to the filter.


    0  

    Filter Actions

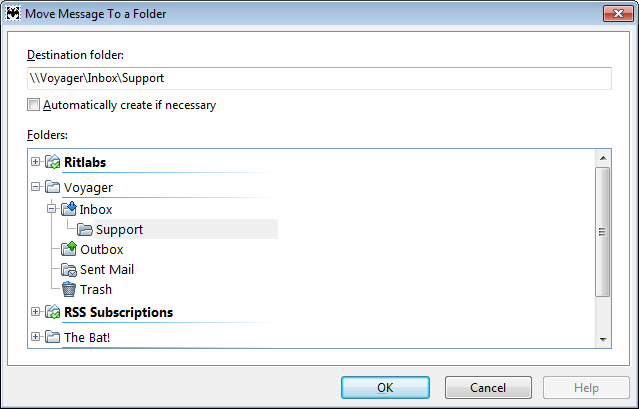
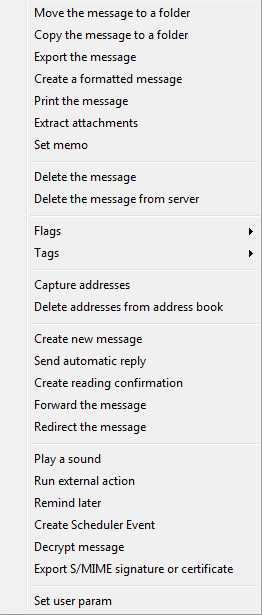
    Each filter has its action(s) that are performed if messages satisfy the specified conditions.

    The most frequently used action is "Move the message to a folder". You can use it to sort out messages from different senders into different folders.

    Copy the message to a folder – Creates a copy of the message in the specified folder

    Export the message – Saves the message into a file. If a file of the same name already exists, you can either overwrite the existing file or append message text to the existing file or increment the file name. To export message headers, select the "Include message headers" check box. You can save the message as plain text, RFC 822 message (.MSG or .EML), Unix mailbox or comma-separated text (.CSV)

    Create a formatted message – Creates a new message using the specified template. This filter can be applied in a number of tasks, for example it can create a reply to messages from certain senders which you can edit or send immediately

    Print the message – Print the message using the specified template

    Extract attachments – Saves attachments on the computer. If a file of the same name already exists, you can either increment the file name or overwrite the existing file or do not extract the new file.

    Set memo – Adds a memo to the message. To view memos, add the Memo message column or enable Memo Auto-view under the Workspace menu (Ctrl+Shift+I)

    Delete the message – Moves the message to Trash (normal deletion)

    Delete the message from server – Deletes the message from the mail server; this action does not delete the message from the program

    The Flags action offers the following options:


    Mark the message as read – This action can be useful for incoming messages as the other ones are already marked as read

    Mark the message as unread – Marks messages as unread (new)

    Toggle message read flag – Marks an unread message as read, and vice versa

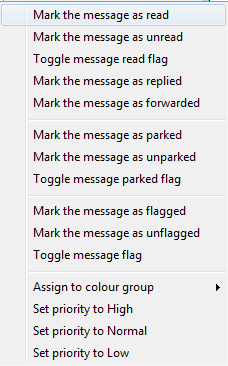
    Mark the message as replied – Sets the “replied” flag

    Mark the message as forwarded – Sets the “forwarded” flag

    Mark the message as parked – Parks the message to prevent it from being accidentally deleted

    Mark the message as unparked – Removes the “parked” flag

    Toggle message parked flag – Parks the message if it is not parked, and vice versa

    Mark the message as flagged – Adds red flag to the message

    Mark the message as unflagged – Removes red flag from the message

    Toggle message flag – Adds a flag to the message if it does not have one, and vice versa

    Assign to color group – Assigns the message to the specified color group

    Set priority to High/Normal/Low – Specifies message priority

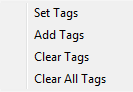
    The Tags action offers the following options:


    Set Tags – Sets the selected tags to the message

    Add Tags – Adds the specified tags to those that are already assigned to the message

    Clear Tags – Removes the specified tags

    Clear All Tags – Removes all the tags

    Capture addresses – Creates a contact in the Address Book using the email address from the message. It can be an email address from the following header fields: From, To, Reply-To, CC, BCC. You may add contacts to several address book groups at once.

    Delete addresses from address book – Removes contacts from the Address Book. You can remove contacts from several address book groups all at once.

    Create new message – Creates a new message using the template. You can use the original message text as a quotation.

    Send automatic reply – Creates a reply using the specified template. You can use the original message text as a quotation.

    Create reading confirmation – Creates a reading confirmation for the recipient using the specified template.

    Forward the message – Forwards the message to the specified address(es). It is possible to include message headers into the message text and not include attachments or add the original message as an .EML file.

    Redirect the message – Redirects the original message to the specified addresses. The recipients will not see that the message has been redirected. It is possible not to redirect the attachments.

    Play a sound – Plays the .WAV file or a standard system sound. To play the sound only within the specified time interval, enable the respective option.

    Run external action – Starts an external process, specified by the command line (for experienced users only)

    Remind later – Creates a reminder for this message in the Scheduler. Specify the time and other settings of the reminder. For example, you can configure a reminder to appear, if you did not reply to certain messages for more than two days.

    Create Scheduler Event – Creates an event in the Scheduler, for more information, see the Scheduler section.

    Decrypt message – Decrypts the message; the filter may ignore messages if they do not contain a signature or their signature is invalid. The decrypted message can replace the original message or be added to the originating folder or any other specified folder. If necessary, The Bat! deletes the original message after decryption. You can also specify actions to perform in case a message cannot be decrypted.

    Export S/MIME signature or certificate – Exports S/MIME certificates or signatures. You can specify whether the entire signature with attached certificates or only the certificate will be exported. It is possible to save the information about the signature in a text file or an .XML file.

    Set user parameters – Allows to set your own parameters (for experienced users only)


    0  

    Creating Filters Quickly

    To create a filter in The Bat! you do not necessarily need to access the Sorting Office. Right-click a message and select the "Create filter" option or press the Ctrl+Shift+F key combination to create a filter quickly. Alternatively, you can use the Specials -> Create filter menu in the main program window. The following window appears:


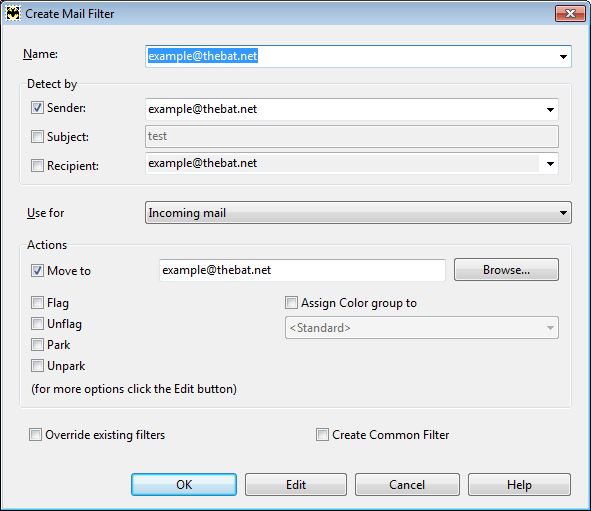
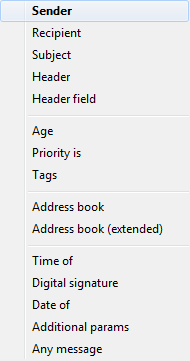
    The default filter name coincides with the sender’s address. You can define your own filter name or select an alternative one from the dropdown menu by clicking the down arrow on the right side of that field.

    Select the condition in the Detect by section. The program can sort out messages by sender, subject or recipient. If you select several conditions, the filter will trigger only if all of them match.

    Specify the category of messages to which the filter should be applied: incoming mail, outgoing mail, read messages or replied messages.

    Define the actions to perform. If you need to move messages to a folder, select the Move to action and specify the folder by clicking the Browse button. To flag, unflag, park or unpark messages, check the respective boxes. To assign a color group, check the "Assign Color group to" box and select a color group in the dropdown menu.

    If you already have filters in the Sorting Office, you may enable the "Override existing filters" option. The Bat! checks filters from the first to the last one in the list, so you can place this filter to the topmost position to make sure it will trigger.

    If you "create a common filter", it will be applied to all of your accounts.

    Click OK to finish creating the filter. This filter will be displayed in the Sorting Office in the respective category. It will be active, and will trigger on any new message that satisfies its conditions.


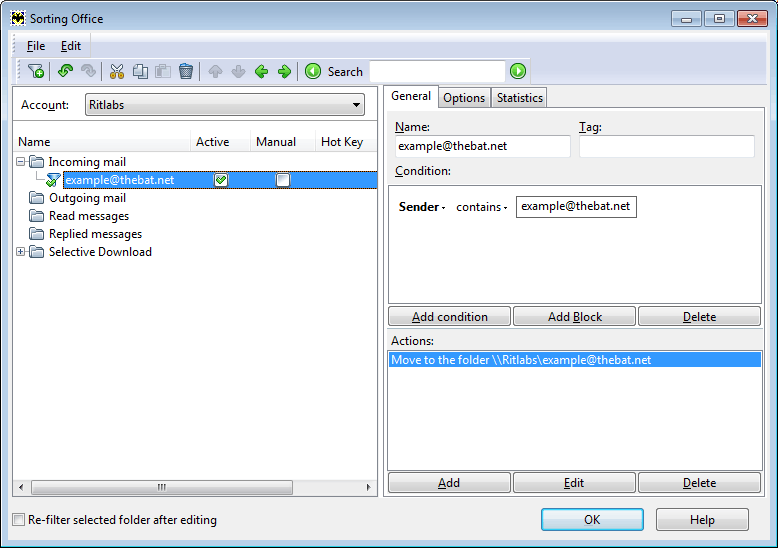
    To edit the filter and add different conditions or actions, click the "Edit" button. Click "Cancel" to abandon changes.


    0